
Five steps keep boho and goddess braids tangle-free from install to takedown: thorough pre-braid detangling with slip, a gentle knotless installation technique, consistent nightly protection, a light daily refresh, and a slow, conditioner-assisted takedown. Follow this checklist before you do anything else.
Your tangle-free braid checklist:
- Detangle completely with a wide-tooth comb, ends to roots, before your appointment
- Ask for knotless installation and consistent, low tension throughout
- Wear a satin bonnet or silk scarf every single night
- Mist braid lengths lightly with a water-based spray each morning
- At takedown, spray a conditioner-water mix on every knot before touching it
Pro Tip: Keep a small water-based braid spray on your nightstand. A quick two-second mist in the morning does more for braid neatness than any heavy cream applied weekly. Reserve thick creams and butters for your scalp only — heavy product on braid lengths attracts lint and speeds up matting.
Table of Contents
- How should you prepare your hair before braiding to prevent tangles?
- Which braiding techniques during installation reduce future tangles?
- What daily and nightly routines keep your braids smooth?
- How do you wash boho and goddess braids without causing tangles?
- How do you protect your braids during workouts, swimming, and travel?
- What is the safest step-by-step takedown process for braids?
- How do you fix the most common causes of braid tangles?
- Afromagicbraiding's pro checklist for longer-lasting, tangle-free braids
- Key Takeaways
- Why gentle prep and patient takedown matter most
- Professional braiding and takedown at Afromagicbraiding
- Useful sources and recommended product categories
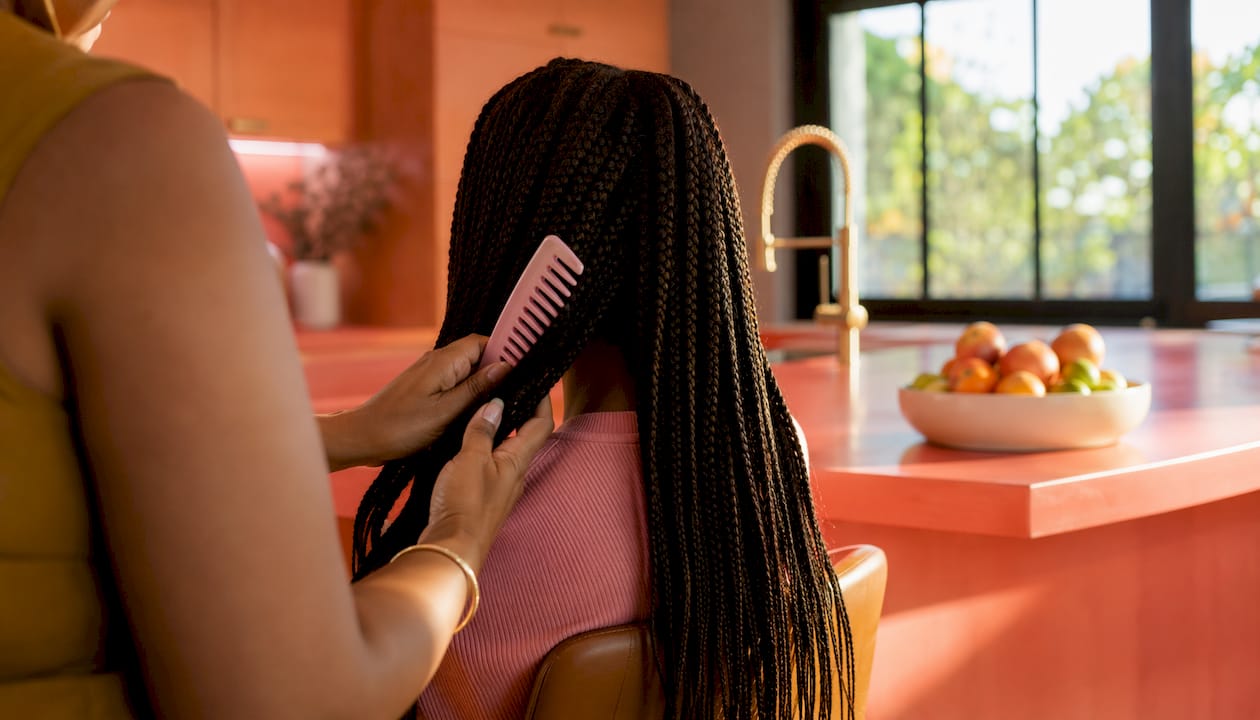
How should you prepare your hair before braiding to prevent tangles?
Thorough detangling with slip is the single most important thing you can do before sitting in the salon chair. Knots sealed into braids during installation have nowhere to go — they tighten over weeks and become the tangles you fight at takedown. Starting with completely smooth, moisturized strands changes everything.
Step-by-step pre-braid prep:
- Wash your hair with a clarifying shampoo no more than one day before your appointment to remove product buildup and oil.
- Follow immediately with a moisturizing conditioner or deep conditioning treatment to restore softness and elasticity.
- Apply a lightweight, water-based leave-in conditioner to damp hair for slip.
- Using a wide-tooth comb, detangle from ends to roots — never root to ends, which forces knots downward.
- Blow-dry fully or air-dry completely before braiding. Damp hair braided tight will mat at the roots as it dries.
- Use a rat-tail comb to create clean, precise parts right before installation begins.
Tools that earn their place in your kit:
- Wide-tooth comb: glides through curls without snapping strands
- Rat-tail comb: creates sharp, clean parts for uniform braid size
- Sectioning clips: hold finished sections out of the way
- Microfiber towel: blots without roughing up the cuticle
- Water-based leave-in spray: adds the slip that lets a comb move freely
For product choices, keep it lightweight. A water-based leave-in or detangling spray gives your strands the slip they need without coating them in residue that will attract lint once the braids are sealed. Save heavier oils and creams for your scalp, not your lengths. A solid pre-appointment hair prep routine makes the difference between braids that stay neat for six weeks and ones that mat by week three.
Pro Tip: Match your part size to your braid size. A one-inch section should receive one inch of braiding hair — not two. Oversized feed-in creates unnecessary root tension and uneven weight distribution, both of which accelerate tangling at the base.
Which braiding techniques during installation reduce future tangles?
Gentle, even tension and a knotless start are the two installation decisions that most directly determine how your braids behave over the following weeks. Knotless braids expose more scalp area, allow better airflow, and make cleansing far easier than traditional knotted starts — all of which lower long-term tangle risk around the roots.
Technique decisions that influence tangle risk:
- Knotless vs. knotted: knotless starts reduce trapped debris and make scalp washing more effective
- Feed-in amount: adding too much synthetic hair at once creates bulk and uneven tension
- Section size: smaller, consistent sections produce more uniform braids that hold their shape longer
- Root finishing: smooth, flat root work prevents early frizz and unraveling at the base
- End sealing: hot water dipping or a light holding spray prevents fraying that leads to tangling at tips
| Installation factor | Correct approach | What goes wrong otherwise |
|---|---|---|
| Tension | Even, low tension throughout | Tight roots cause traction stress and early frizz |
| Feed-in | Small, gradual additions | Large clumps create bulk and uneven weight |
| Section size | Consistent, matched to braid size | Borrowed hair from adjacent sections causes knots |
| Synthetic hair texture | Pre-stretched, smoother fiber | Rough or tangled fiber mats quickly against natural hair |
| End sealing | Hot water dip or light spray | Unsealed ends fray and tangle with neighboring braids |
For boho and goddess styles specifically, choose pre-stretched synthetic hair with a smoother fiber texture. Rougher, un-stretched fiber tangles against your natural hair faster and attracts more lint. The extra few minutes your stylist spends pre-stretching the hair pays off across the entire wear period.
Pro Tip: When booking, tell your stylist: "I want low-tension installation and knotless starts, please." You can also ask them to match the feed-in hair weight to your natural hair weight in each section. That one conversation prevents weeks of scalp soreness and root frizz.
What daily and nightly routines keep your braids smooth?
Morning refresh plus nightly protection equals braids that still look fresh at week four. The routine takes under five minutes total, and skipping it even a few nights in a row shows up as frizz and tangles you cannot easily reverse.
Daily care checklist:
- Mist braid lengths lightly with a water-based braid spray each morning
- Apply a small amount of scalp oil to any dry or itchy areas along your parts
- Smooth edges with a light edge control product and a soft brush
- Avoid repeatedly touching, re-parting, or pulling at your braids throughout the day
- Resist the urge to refresh with heavy creams — hands-off behavior reduces frizz as effectively as any product
Nightly protection routine:
- Wrap hair in a satin scarf or place a satin bonnet over your braids before bed
- For longer braids, loosely gather them into a pineapple or a low, soft bun to prevent friction at the nape
- If you run hot at night, a satin pillowcase as a backup layer cuts friction even when the bonnet slips off
- Avoid high-collar pajama tops that rub against the nape and cause frizz at the roots
Pro Tip: Over-moisturizing braid lengths is one of the most common mistakes. A light mist is all you need. Heavy creams build up on the synthetic fiber, attract lint, and make your braids look dull and matted more quickly. Less is genuinely more here.
How do you wash boho and goddess braids without causing tangles?
Clean scalp, fully dried roots. That combination prevents the two biggest causes of mid-wear tangling: product buildup and damp roots that mat together as they dry. Washing braids correctly takes patience, but the method is straightforward once you know it.
Step-by-step washing method:
- Mix a small amount of clarifying or gentle shampoo with water in an applicator bottle.
- Part your braids into four sections and apply the diluted shampoo directly to your scalp in each section using the nozzle.
- Massage your scalp gently with your fingertips — no circular scrubbing that tangles the braid bases.
- Rinse downward, letting water run from roots to ends. Never bunch braids together under the shower head.
- Apply a lightweight conditioner or braid-safe leave-in to your lengths, avoiding heavy buildup at the roots.
- Blot with a microfiber towel. Do not rub or wring.
- Air-dry completely, or use a hooded dryer or blow-dryer on a cool setting for dense styles.
Washing dos and don'ts:
- Do: dilute your shampoo before applying it
- Do: rinse in one direction, roots to ends
- Do: dry fully before sleeping or covering with a bonnet
- Don't: soak braid lengths in heavy conditioner — it weighs them down and causes matting
- Don't: go to bed with damp roots — this is the fastest route to root matting and odor
- Don't: wash more than once a week unless you work out daily
For scalp care between washes, a lightweight scalp oil applied along your parts two to three times a week keeps dryness and itching manageable without adding product buildup to your lengths. Wash frequency depends on your activity level: once a week for active lifestyles, every ten days to two weeks for lower-activity periods.
How do you protect your braids during workouts, swimming, and travel?
Sweat and water change what your braids need. The adjustments are small but specific, and skipping them is what turns a great install into a frizzy, tangled mess by the end of the week.
Activity-specific care:
- Workouts: Wear a sweat-wicking headband to absorb moisture at the hairline. Tie braids in a loose, low style to limit movement and reduce friction at the nape and temples. After your workout, mist your roots lightly and let them air-dry before covering with a bonnet.
- Swimming: Pre-rinse your braids with clean water before entering a pool — saturated hair absorbs less chlorine. Wear a swim cap over your braids when possible. After swimming, rinse thoroughly with clean water immediately and allow braids to dry completely before sleeping.
- Travel: Pack a small satin travel pillowcase. On long flights or road trips, loosely braid or gather long braids to prevent them from rubbing against seat backs. Avoid storing braids compressed in a tight bag or hat for extended periods.
- High-friction activities: Avoid heavy gels immediately after any sweaty activity — they mix with sweat residue and create buildup that accelerates frizz. A light braid spray is the better post-activity choice.
For extension care during these activities, a lightweight frizz-control product applied sparingly to the lengths before swimming or heavy activity adds a protective layer without weighing the fiber down.
What is the safest step-by-step takedown process for braids?
Takedown is slow and slippery. Patience here prevents the breakage and severe post-braid tangles that make people dread removing their protective styles.
Step-by-step takedown:
- Set up your workstation with a spray bottle filled with a conditioner-water mix, sectioning clips, a wide-tooth comb, and a detangling brush.
- Divide your braids into four to six sections and clip all but the one you are working on.
- Spray the conditioner-water mix generously onto the braid you are removing, focusing on the knot or sealed end.
- Slide the braid apart from the bottom using your thumb and index finger — a slow sliding motion, not a pull.
- Once the extension hair is free, finger-detangle your natural hair gently before touching it with a comb.
- Work upward with a wide-tooth comb only after finger-detangling is complete.
- Clip the finished section out of the way and move to the next.
- After all braids are removed, shampoo, deep condition, and detangle your natural hair fully before any heat or styling.
For a visual reference on the sliding finger technique, this
demonstrates exactly how to loosen braids without snagging.Takedown tools checklist:
- Spray bottle with diluted conditioner
- Wide-tooth comb
- Detangling brush
- Sectioning clips
- Microfiber towel
Avoid these takedown mistakes: ripping braids apart without slip, skipping the conditioner spray, detangling aggressively on wet hair, and trying to rush through a dense style in one sitting. For long, thick braids, budget two to three hours and take breaks. Rushing is the single biggest cause of post-takedown breakage.
For additional guidance on braid unraveling and safe removal, especially for styles that have been in longer than six weeks, a professional takedown service is worth considering.
How do you fix the most common causes of braid tangles?
First, identify where the tangle is coming from: buildup, friction, new growth, or an installation issue. Each cause has a different fix, and treating the wrong one wastes time and risks damage.
Common problems and quick fixes:
- Product buildup on lengths: Apply diluted shampoo directly to the affected area with an applicator bottle, massage gently, and rinse thoroughly. Follow with a light leave-in spray.
- Frizz at the roots: Apply a small amount of light mousse or braid foam to the frizzy area, smooth with your fingertips, and tie down with a satin scarf for 20–30 minutes.
- Lint caught in braids: Use a fine-tooth pick or your fingertips to carefully lift lint out. Never brush aggressively — this pulls fiber apart and worsens the tangle.
- New growth tangling at the base: Mist the root area with water and a leave-in, then gently smooth with your fingertips. This is a sign the style is approaching its wear limit.
- Braids tangling with each other: Separate them gently with fingers and apply a light braid spray. If they are consistently tangling, the braids may be too long or too fine for the current style.
Red flags that need professional attention:
- Scalp tenderness or soreness that persists beyond the first three days after installation
- Visible thinning or breakage at the temples or nape
- Braids that cannot be separated without significant force
- Scalp bumps, inflammation, or persistent itching that does not respond to scalp oil
If you notice any of these signs, book a professional consultation rather than attempting a DIY fix. Partial re-braiding by a skilled stylist is a healthier option than forcing a damaged style to last longer.
Afromagicbraiding's pro checklist for longer-lasting, tangle-free braids
What separates a six-week install from one that mats by week two comes down to three things professionals do consistently: precision parts, even tension throughout, and scalp-focused moisture. Everything else supports these three.
Salon checklist to bring to your booking or consultation:
- Request knotless installation for easier scalp access and cleansing
- Ask for consistent, low tension — especially at the temples and nape
- Confirm part sizes are matched to your desired braid size
- Discuss braid length relative to your lifestyle (longer braids need more active nightly protection)
- Ask about pre-stretched synthetic hair options for boho and goddess styles
Pro Tip: Tell your stylist your wash frequency upfront. A stylist who knows you wash weekly will choose a technique and product approach that holds up to regular water exposure. That one conversation shapes every installation decision they make.
The salon truth about braid longevity: The clients whose braids last longest are not the ones who use the most products. They are the ones who protect at night, keep their hands out of their hair during the day, and come in for a fresh install before the style deteriorates past the point of easy takedown. Consistency in the small habits outperforms any single product.
Afromagicbraiding's stylists specialize in knotless and boho braid installations designed with maintenance in mind — precise parts, tension-free feed-in, and scalp-first care built into every appointment.
Key Takeaways
Tangle-free boho and goddess braids require thorough prep, a knotless low-tension install, nightly satin protection, careful washing, and a slow conditioner-assisted takedown.
| Point | Details |
|---|---|
| Pre-braid detangling | Use a wide-tooth comb from ends to roots with a water-based leave-in for slip before every appointment. |
| Knotless installation | Knotless starts improve scalp access, reduce trapped debris, and lower long-term tangle risk at the roots. |
| Nightly protection | A satin bonnet or silk scarf every night cuts friction-related frizz and preserves braid neatness significantly. |
| Washing method | Dilute shampoo in an applicator bottle, clean the scalp in sections, rinse downward, and dry roots fully before sleeping. |
| Afromagicbraiding | Professional installation and takedown services in Southfield, MI, with knotless and boho/goddess styles built for long-lasting wear. |
Why gentle prep and patient takedown matter most
Most of the braid damage people attribute to "protective styles" actually comes from two moments: the installation and the removal. Everything in between, the washing, the nightly routine, the product choices, is maintenance. But the prep and the takedown are where the real decisions happen.
A braid installed with too much tension does not become comfortable over time. The scalp adapts to some degree, but the mechanical stress on the follicle is ongoing for every day the style is in. Small part sizes, even feed-in, and a knotless start are not just comfort choices — they are health choices that affect whether your edges stay full over years of protective styling.
The takedown is where most people rush, and it shows. Hair that took six weeks to grow and protect gets ripped out in thirty minutes because the conditioner spray felt like an unnecessary step. That spray is not optional. It is the difference between leaving the style with your length intact and leaving it with a handful of shed hair that should still be on your head.
What we believe at Afromagicbraiding is simple: every braid tells a story, and that story should end well. Gentle technique at both ends of the process, install and removal, is what makes protective styling actually protective.
Professional braiding and takedown at Afromagicbraiding
Tangle-free braids start with a skilled installation, and that is exactly what Afromagicbraiding delivers in Southfield, MI. Rather than spending hours troubleshooting a style that was installed with uneven tension or oversized feed-in, let a professional handle the foundation so your maintenance routine stays simple.

Afromagicbraiding offers knotless braids, boho and goddess braids, box braids, Fulani braids, and professional takedown services — all booked online in minutes. Every install is built around precision parts, low tension, and scalp-first care, so your braids hold their shape longer and come out cleaner. Browse the style gallery to see completed looks, read what clients say on the reviews page, and when you are ready, book your appointment directly online. Your next install, and your easiest takedown yet, starts here.
Useful sources and recommended product categories
Sources referenced in this article:
- How to Maintain Braids: Frizz Control, Scalp Care, and Longevity — CU Independent
- Tangle-Free Braids: Tips and Techniques — HairingCaring
- How to Maintain Braids, According to Experts — NBC News Select
- Knotless Braids 101: A Beginner's Tutorial — L'Oréal Paris
- Safe Braid Removal Technique — YouTube tutorial
- Hair Extensions Care Sheet — HairLocks Hair Extensions
Recommended product categories (generic):
- Water-based braid spray (for daily length hydration)
- Lightweight braid foam or mousse (for frizz control and root smoothing)
- Satin bonnet or silk scarf (nightly friction protection)
- Wide-tooth comb and detangling brush (pre-braid and takedown)
- Microfiber towel (blotting without cuticle damage)
- Diluted clarifying shampoo in an applicator bottle (scalp washing)
- Lightweight scalp oil (between-wash scalp nourishment)
Further reading from Afromagicbraiding:
- Detangling Before Braiding: Natural Hair Prep Guide
- Your Boho Braid Care Routine: Expert Tips That Work
- Box Braids Tips for Healthy, Long-Lasting Styles