
Protecting your hair health before a braiding visit comes down to one non-negotiable truth: protective styling only protects when your prep is thorough. Arrive with clean, detangled, well-conditioned hair and your stylist can focus on crafting something beautiful. Skip the prep, and the tension and weight of braids work against you instead of for you.
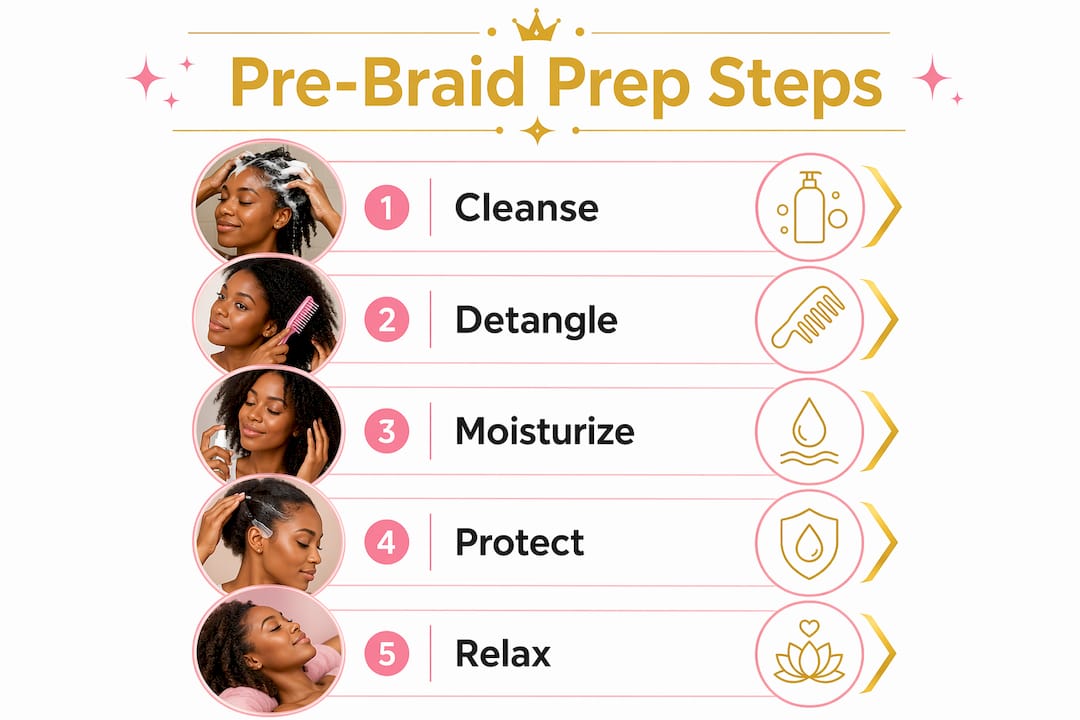
Here is exactly what to do before you sit in the chair:
- Clarify your scalp with a clarifying shampoo 1–2 days before your appointment, not the morning of
- Detangle fully while hair is damp, working from ends upward with a wide-tooth comb or your fingers
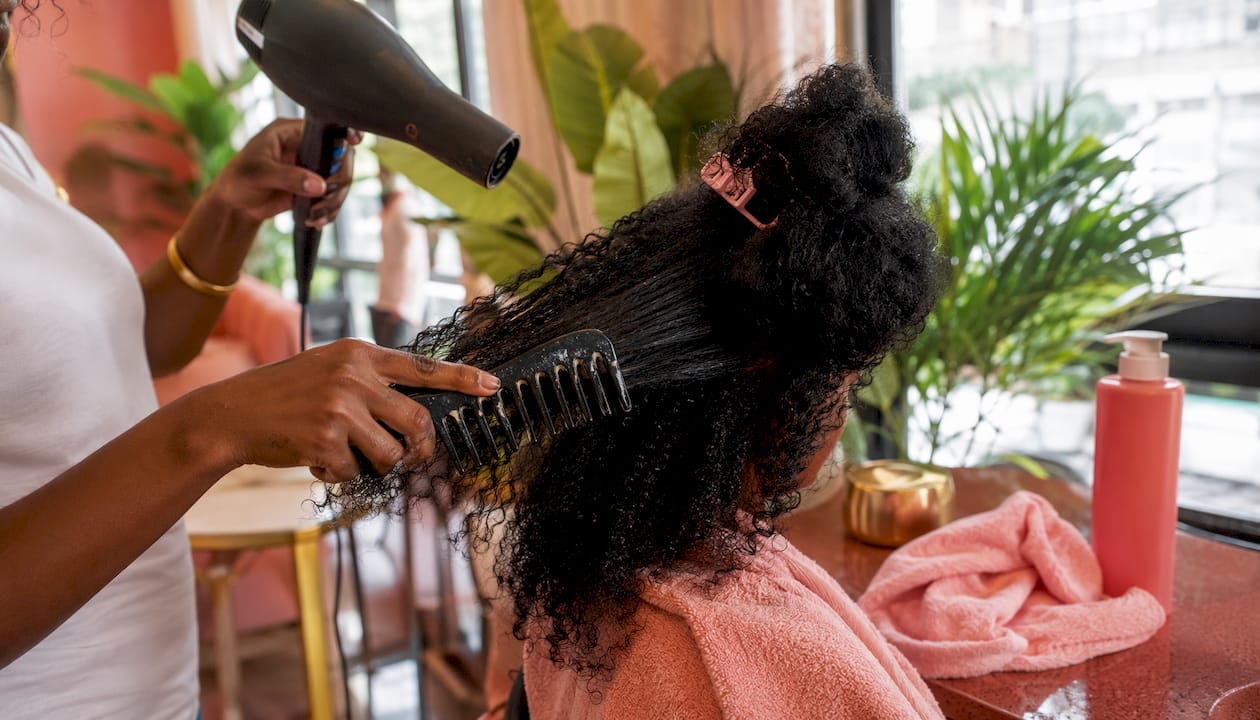
- Stretch gently using a blow dryer with heat protectant, never a flat iron
- Apply a protein treatment if your hair is fragile, porous, or chemically treated, then follow immediately with a deep moisturizing conditioner
- Skip heavy oils and greases the day of your appointment; they make hair slippery and reduce braid grip
- Check your scalp for redness, sores, or tenderness and postpone your visit if any are present
Pro Tip: Think of pre-braid prep the same way you'd think of priming a canvas. Every step you take before the appointment directly determines how long your style lasts and how healthy your hair comes out.
Why a clean scalp is the foundation of great braiding
Product buildup, natural oils, and environmental debris create an invisible barrier on your scalp and strands. That barrier prevents your stylist from achieving consistent tension, and once braids are installed, it traps irritants against your skin for weeks. Clarifying before braids removes that barrier entirely, giving your stylist clean, grippy hair to work with.
Wash 1–2 days before your appointment, not the morning of. Freshly washed hair on appointment day can be too soft and slippery. Washing the day before gives your scalp time to produce just enough natural oil to stay comfortable without compromising grip.
A clean scalp is easier to maintain once the style is installed. Buildup trapped under braids leads to itching, flaking, and even bacterial growth over weeks of wear. Starting clean is the single most impactful thing you can do before installation.
When you shampoo, massage your scalp with your fingertips in small circular motions. This stimulates circulation and loosens debris without scratching. Rinse thoroughly, because shampoo residue left behind creates its own buildup problem.
How to detangle and stretch hair for a smooth install
Detangling wet or tangled hair incorrectly is one of the fastest ways to cause breakage before you even sit in the braiding chair. Wetting tangled hair without slip agents first causes knots to tighten into what stylists call "fairy knots," which are nearly impossible to remove cleanly. Start with a detangling spray or a lightweight oil applied to dry hair before you ever turn on the water.
Follow these steps for a breakage-free detangle and stretch:
- Apply a detangling spray or light oil to dry hair before wetting it
- Work in sections, starting from the ends and moving upward toward the roots
- Use your fingers first to separate large knots, then follow with a wide-tooth comb
- Shampoo and condition once hair is tangle-free
- Apply a heat protectant spray before blow-drying
- Blow-dry in sections to ensure roots are fully stretched and dry, not just the lengths
- Avoid flat irons; they create bone-straight hair that is actually harder for stylists to grip and section cleanly
Pro Tip: Low-tension stretching with a blow dryer on medium heat preserves far more hair strength than high-heat methods. Your goal is elongated, manageable hair, not perfectly straight strands.
How hair texture, density, and length affect your prep
Your hair's characteristics directly shape which prep steps matter most for you. A one-size-fits-all routine misses the nuances that protect your specific hair type.
- Hair length: Most braid styles require a minimum length of natural hair sufficient for the extension to grip properly. Discuss your desired style with your stylist beforehand if you are unsure whether your length qualifies.
- Dense, tightly coiled textures: Require the most thorough detangling and stretching. Shrinkage can make hair appear shorter than it is, and skipping the stretch step leads to uneven parting.
- Fine or chemically treated hair: Benefits most from a protein treatment before braiding. Protein treatments strengthen the hair cuticle to handle the weight and tension of extensions worn for 4–8 weeks.
- Coarser textures: Need deep moisture replenishment before installation. Coarse hair tends to feel dry faster under braids, so arriving well-conditioned extends comfort and style longevity.
- Color-treated hair: Treat it like chemically processed hair. Prioritize both protein and moisture before your appointment.
Your stylist may adjust their technique based on your texture and the braid size you choose, so communicating your hair history upfront saves time for everyone.
Removing old braids and avoiding chemical treatments before braiding
How you take down your previous style matters as much as how you prep for the next one. Rushing a takedown causes breakage that compounds under the next installation.
- Cut extension hair carefully at the base before unraveling to reduce the amount of manipulation on your natural strands
- Apply a moisturizing detangling product before and during takedown to soften shed hair and prevent it from matting with your natural hair
- Deep condition after removal and allow your hair and scalp at least one to two weeks to recover before your next install
- Avoid chemical relaxers, dyes, or keratin treatments in the weeks leading up to your braiding appointment; these weaken the hair shaft and increase breakage risk under tension
- Trim split or damaged ends before your appointment; split ends travel up the strand under braids and cause more damage over the weeks of wear
Recovery time between styles is not optional. Your scalp needs a break from tension, and your strands need time to absorb conditioning treatments fully.
What stylists look for when you arrive at your appointment
Your stylist's ability to deliver clean, long-lasting braids depends heavily on the condition of your hair when you walk in. Here is what they need from you:
- Clean, dry hair free from heavy oils, greases, or thick leave-in products that reduce grip
- Fully detangled and stretched strands so parting lines are clean and braids sit evenly
- A healthy scalp with no visible sores, redness, or excessive flaking
- Balanced moisture and protein so hair bends under tension rather than snapping
- No heavy product buildup from edge controls, thick butters, or wax-based stylers applied the day before
Stylists may ask clients to wash or treat their hair before proceeding if the hair arrives in poor condition. Arriving prepared respects your stylist's time and your own appointment slot.
How braids affect hair health and what to do about it
Braids add weight and tension to your strands, and hair that goes in dry or weak comes out worse. Proper pre-braid care reduces breakage, scalp irritation, and the risk of traction alopecia, a form of hair loss caused by prolonged tension on the follicle.
- Avoid heavy, greasy products before braiding; they reduce tension consistency and cause uneven braids
- Moisturize braids regularly during wear, at least three to five times per week, to prevent dryness and breakage
- Keep your scalp clean during wear using a diluted shampoo or cleansing oil applied with a nozzle applicator
- Protect braids at night with a satin bonnet or silk pillowcase to reduce friction and frizz
Pro Tip: If your braids feel painfully tight during installation, say something immediately. A skilled stylist will loosen them in real time. Tight braids that stay tight are the primary cause of traction alopecia.
What trichologists and stylists say about pre-braid preparation
The professional consensus on pre-braid prep is clear and consistent across trichologists and experienced braiding stylists.
Protective styling only protects when pre-installation care is thorough. Skipping prep risks breakage and scalp damage caused by the tension and weight of braids. Hair that goes in clean, conditioned, and properly stretched is far more likely to come out thriving.
Key expert-backed principles:
- Protein treatments fill gaps in the hair cuticle and reinforce the shaft before weeks of tension
- A clarifying wash 1–2 days before removes invisible buildup from edge controls and styling products that impede tension and neatness
- Avoid applying heavy oils before your appointment; stylists need a naturally grippy hair surface to maintain consistent braid tension
- An inflamed or sore scalp will worsen under braid tension, increasing the risk of permanent follicle damage; reschedule if scalp issues are present
- Balanced moisture and protein keep hair flexible, so it stretches under tension rather than snapping
Pro Tip: Always follow a protein treatment with a moisturizing conditioner. Protein strengthens hair, but too much without moisture makes strands brittle. The balance is what keeps hair resilient.
The moisturizing and conditioning routine your hair needs before braiding
Deep conditioning before braiding is not a bonus step. It is what allows your strands to flex under tension rather than break. Apply a moisture treatment mask after your protein treatment and let it sit for at least 15–30 minutes, ideally under a plastic cap with gentle heat to help the product penetrate the shaft.
After rinsing, apply a leave-in conditioner while hair is still damp, followed by a lightweight moisturizing cream. Seal with a light oil to lock hydration in. This layered approach, often called the LOC method (Liquid, Oil, Cream), creates a moisture barrier that sustains your strands through weeks inside a protective style. Focus extra product on your ends, which are the oldest and most fragile part of each strand.
Scalp treatments and massages that prepare your scalp for braiding
Your scalp is the soil your hair grows from, and its condition before installation sets the tone for everything that follows. A scalp care routine in the days before your appointment makes a measurable difference in comfort during wear.

Use a targeted scalp serum or light soothing oil two to three days before your appointment to address dryness or sensitivity. During your clarifying wash, massage your scalp in small circular motions for several minutes. This increases blood flow to the follicles and helps loosen buildup before shampooing. If you have a history of dandruff or seborrheic dermatitis, use a medicated shampoo during your pre-braid wash rather than waiting until symptoms flare under your braids.
Avoid applying thick scalp oils or heavy grease the day of your appointment. A lightly nourished scalp is comfortable; a heavily coated one is slippery and harder for your stylist to work with cleanly.
Protective styling tips to follow immediately after braiding
The first 48–72 hours after installation set the tone for how your braids wear and how your hair holds up underneath.
Wrap your hair in a satin bonnet or sleep on a silk pillowcase every night from day one. Cotton pillowcases pull moisture from braids and create frizz at the roots. Begin moisturizing your braids within the first two days, using a lightweight oil spray or braid spray on the lengths and a gentle scalp oil on your part lines. Avoid getting braids soaking wet in the first few days while the style settles.
Check your edges and nape daily for the first week. These areas are the most vulnerable to tension-related stress, and catching tightness early prevents long-term damage. If your hairline feels sore or you notice small bumps forming, apply a soothing scalp oil and avoid pulling the braids back tightly until the sensitivity resolves.
Ready to book your next braiding appointment?

At Afromagicbraiding, every braid tells a story, and we want yours to start with healthy, well-prepared hair. Our stylists in Southfield, Michigan are trained to work with your hair's unique texture, density, and history to deliver results that are both beautiful and protective. Browse our braiding style portfolio to find your next look, then book your appointment and arrive ready to transform your hair into art.
Key Takeaways
Arriving at your braiding appointment with clean, detangled, conditioned, and scalp-checked hair is the single most effective way to protect your hair health and extend the life of your style.
| Point | Details |
|---|---|
| Clarify 1–2 days before | Use a clarifying shampoo before your appointment to remove buildup and give your stylist clean, grippy hair. |
| Detangle before wetting | Apply a detangling spray or light oil to dry hair first to prevent fairy knots from forming during washing. |
| Balance protein and moisture | Follow any protein treatment with a deep moisturizing conditioner so hair stays strong and flexible, not brittle. |
| Check your scalp first | Postpone your appointment if your scalp shows redness, sores, or tenderness; braiding over an inflamed scalp risks traction alopecia. |
| Skip heavy oils day-of | Avoid thick greases and heavy butters before your visit; they reduce braid tension and lead to uneven, slippery braids. |