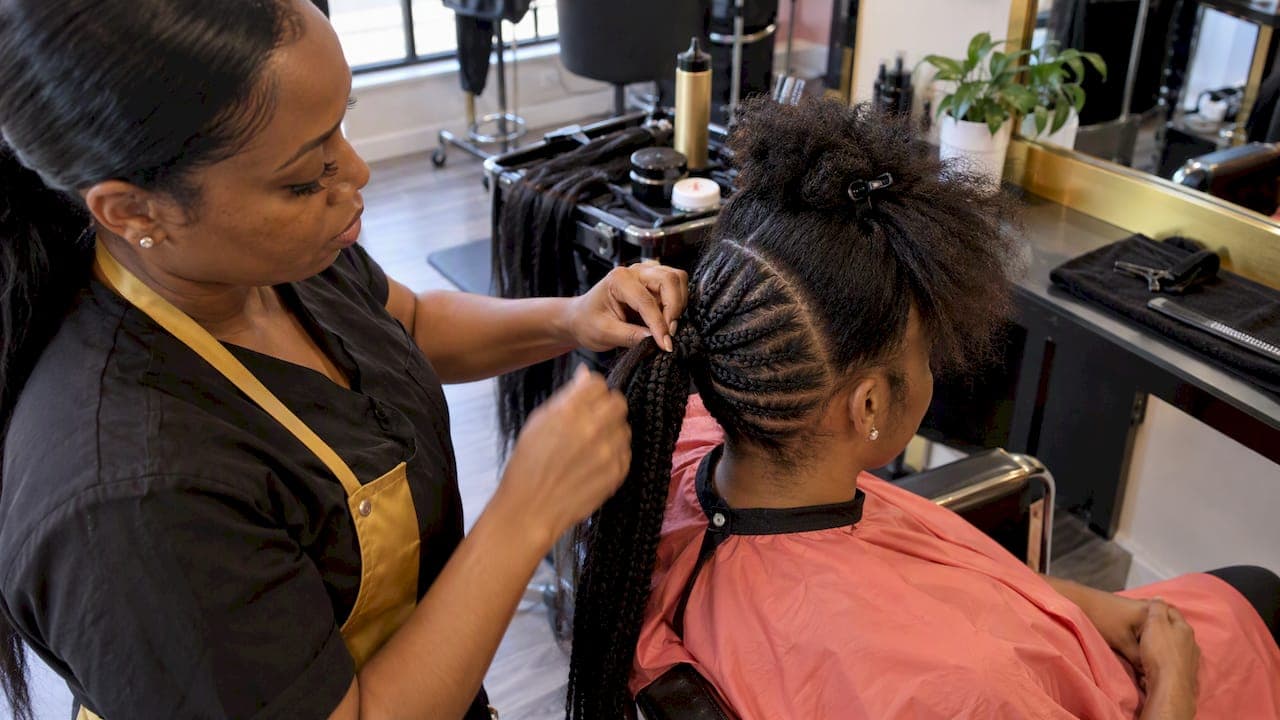
A feed-in ponytail is a braided style where small sections of hair are gradually added into cornrow-style braids that flow into a sleek, gathered ponytail base. The quick verdict: start small, add hair progressively, and if any part of it hurts, loosen it immediately. Comfort always comes before a tighter look.
TL;DR:
- Keep the tension loose and check for discomfort regularly, especially at the edges, to prevent traction alopecia and reduce scalp damage.
- Use small, triangular sections near the hairline and gradually feed in extension hair as you braid toward the ponytail to ensure even weight distribution.
- Style should be worn no longer than six to eight weeks, and loosen or remove it immediately if you experience pain, headaches, or thinning.
- Lighter, synthetic extension hair and a lightweight installation reduce strain and minimize the risk of damage over time.
- Professional installation is recommended for those with fragile edges, high tension needs, or when a fully invisible base is desired.
Table of Contents
- What to gather and how to prep hair before a feed-in ponytail
- Step-by-step: how to create a feed-in braided ponytail
- Styling variations: bangs, invisible base, double ponytails, and kids
- Safe wear time and hair-health maintenance
- Troubleshooting common feed-in ponytail problems
- Our salon-tested checklist for a reliable install
- A stylist's take on style versus comfort
- Ready for a feed-in ponytail without the guesswork?
- FAQ
- Sources
What to gather and how to prep hair before a feed-in ponytail
Good prep is what separates a smooth install from a frustrating one. We always tell clients to detangle thoroughly before braiding and moisturize from root to tip so the hair glides instead of snags.
Before you sit down to braid, gather:
- A wide-tooth comb and a rat-tail comb for clean, precise parts.
- Duck clips to section hair out of the way as you work.
- A water or leave-in conditioner mist bottle to keep strands pliable.
- A satin scarf or bonnet for nighttime protection once the style is done.
- Elastics or a drawstring pony base to anchor the finished braids.
If you want extra volume or length, lightweight braiding hair works best, and you can stretch the extension hair beforehand to cut down on bulk and pulling. Define the pony zone with a light part before you start, and do a quick scalp check: if your hairline feels sensitive that day, plan for looser tension than usual.
Step-by-step: how to create a feed-in braided ponytail
Once your hair is prepped, the install itself follows a simple progression. Here is the sequence we use in the chair, adapted for home styling.
- Section and plan the pony base. Decide on high or low placement first, since that determines how your starter braids will angle toward the crown.
- Start each feed-in braid at the hairline. Use small, triangular parts near the perimeter and begin with a thin piece of natural hair, no extension hair yet.
- Feed in hair gradually. As you braid toward the ponytail zone, add small pieces of extension hair with each pass so the braid thickens evenly and the weight never concentrates in one spot.
- Gather the finished braids into the ponytail. Secure the base with an elastic, then wrap one of the braids around the elastic itself to hide it, a trick that gives a clean, salon finish without added hardware.
- Finish and protect. Smooth the edges with a light moisturizer, and if you are heading to bed, wrap the ponytail and edges in satin to prevent friction overnight.
Pro Tip: Braid the back sections first and work forward. It keeps tension even and makes the front, where your edges live, the easiest part to control.
This method keeps weight distributed instead of loaded at the nape or hairline, which is where most discomfort starts. If a section feels tight the moment you finish it, redo that one row rather than pushing through and hoping it loosens on its own.
Styling variations: bangs, invisible base, double ponytails, and kids
The feed-in technique adapts easily once you understand the basic progression.
- High vs. low ponytail: a high pony needs more upward angle in the starter braids, while a low pony distributes tension more horizontally across the nape.
- Feed-in bangs: plan smaller front sections and use shorter starter braids so the fringe lies flat without pulling the hairline back.
- Invisible ponytail: wrap a finished braid around the base elastic so no rubber band or clip is visible.
- Double ponytails: part the crown down the middle first, then balance the weight of each side so one pony does not pull harder than the other.
- Kids' version: use smaller sections, gentler tension throughout, and plan for a shorter wear time with more frequent check-ins on comfort.
Each variation uses the same core skill: feeding hair in gradually and checking tension as you go.
Safe wear time and hair-health maintenance
Dermatologists recommend keeping braided styles, including feed-in ponytails, in for no longer than 6 to 8 weeks, then giving the scalp a rest before the next install. This 6 to 8 week window matters because traction alopecia is cumulative: repeated tension over time, rather than one tight day, is what damages follicles, so rotating styles gives hair a real chance to recover.
Between washes, keep the scalp clean and moisturized with a light, water-based routine, and sleep in a satin bonnet or scarf every night to cut down on friction. Proper prep and professional installation also reduce the risk of damage from extensions in the first place.

Remove or loosen the style right away if you notice persistent pain, headaches, or visible thinning along the hairline. Keeping the perimeter rows slightly looser than the crown, and leaving a bit of slack at the edges, protects the most fragile hair on your head.
Troubleshooting common feed-in ponytail problems
Small fixes can save a style without a full redo.
- If it hurts: find the specific tight row, not the whole braid, and loosen just that section.
- Bulky base: wrap an extra braid around the elastic, or tuck a foam hair donut underneath for a smoother shape.
- Too heavy: switch to lighter synthetic hair or trim the length to ease pull at the roots.
- Quick refresh: tuck loose strands, smooth on a touch of leave-in before bed, and rewrap edges gently in the morning.
Pro Tip: A two-finger test at the hairline tells you a lot: if you can't slide two fingers comfortably under a braid's base, it's too tight.
Our salon-tested checklist for a reliable install
Before any feed-in ponytail leaves our chair, we run through the same checkpoints every time: even section sizes, a tension check after every few starter braids, and a finishing wrap that hides the base cleanly. We favor lightweight hair over heavier kanekalon for less pull at the root, and we recommend booking a professional install when edges are fine, the base needs to be fully invisible, or time is tight.

A stylist's take on style versus comfort
A feed-in ponytail should never fight your scalp to look good. We choose looser, more forgiving installs whenever edges are fragile, because a style that lasts eight weeks without pain beats one that looks sharp for two days and leaves damage behind.
— Afro
Ready for a feed-in ponytail without the guesswork?
We install feed-in and knotless ponytails using tension-free techniques built around your hairline, and our shop carries the braiding hair and accessories to match. Book your ponytail appointment and see the difference a tension-free install makes.

FAQ
How do you feed hair into a ponytail?
You start each braid at the hairline with a small section of natural hair, then add thin pieces of extension hair gradually as you braid toward the ponytail area. This keeps the weight even instead of concentrated at one spot.
How long can you leave feed-in braids in?
Dermatologists recommend wearing braided styles for no more than 6 to 8 weeks before taking them down and giving your scalp a break. Removing the style sooner is fine if you notice pain, headaches, or thinning at any point.
What is a feed-in for hair?
A feed-in is a braiding technique where extension hair is added gradually into a braid rather than attached all at once at the root. It creates a more natural-looking taper and spreads tension more evenly along the braid.
Do feed-in braids damage hair?
Feed-in braids can cause damage if they are installed too tight or worn too long, since traction alopecia develops from repeated, cumulative tension rather than a single tight day. Pain or headaches during or after installation are early warning signs that a section needs to be loosened.
Sources
- Hairstyles that pull can cause hair loss | American Academy of Dermatology (AAD)
- Helping patients with traction alopecia: basics, treatment and prevention | Dermatology Times
- Traction alopecia early warning signs | The Hair Society