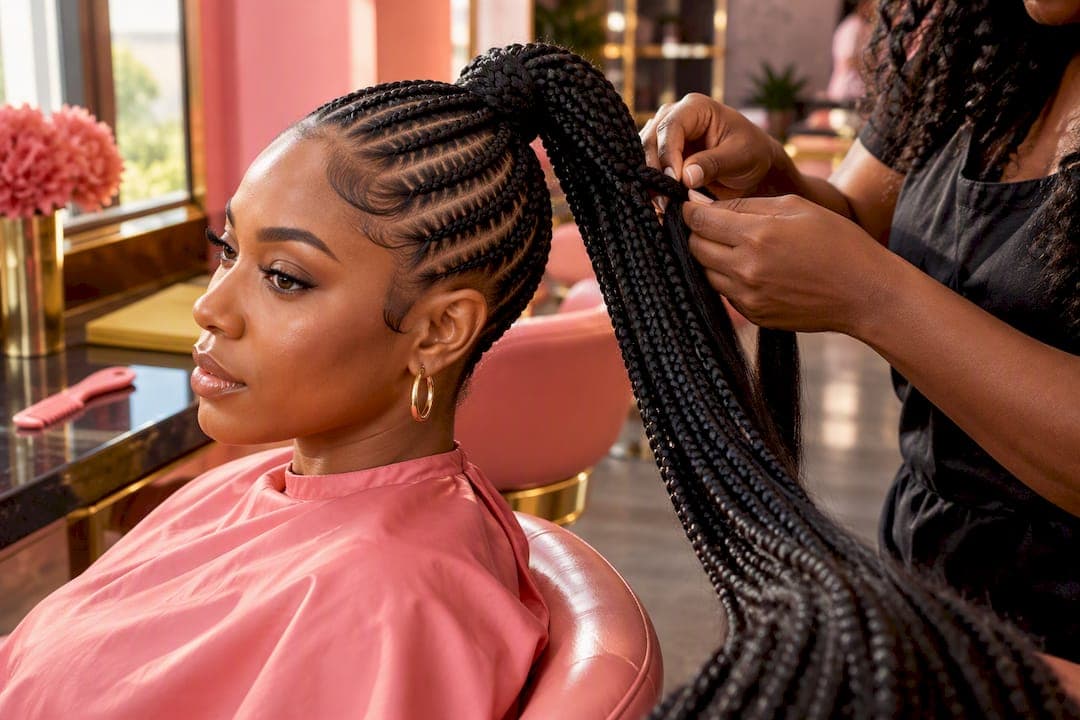
A stitch braids ponytail uses feed-in stitch cornrows gathered into one sleek tail, giving you a long-lasting protective style with a polished, statement finish. Done with gentle tension, it protects your natural hair while looking uniquely yours. If any part of it pulls or aches once it is installed, that is your cue to loosen it right away.
TL;DR:
- Stitch braids should be installed with gentle tension to prevent pulling, pain, or damage, and the style typically lasts six to eight weeks with proper care.
- Using synthetic Kanekalon or human-hair blend extensions and metal-free elastics helps maintain a neat, long-lasting look and reduces breakage risks.
- Variations like zigzag parts, face-framing pieces, or two-tone extensions can significantly alter the style's appearance with minimal extra effort.
- Loosening braids during installation and limiting continuous wear are essential to reduce the risk of traction alopecia and scalp damage.
- Professional installation is recommended for intricate parting or a flawless finish, with emphasis on tension control and proper scalp care.
Table of Contents
- How do you create a stitch braid ponytail step by step?
- Supplies and prep for a longer-lasting result
- Styling variations that change the whole look
- How long do stitch braids in a ponytail actually last
- Tension, traction alopecia, and how to braid safely
- Salon-tested tips for a smoother install
- Is the stitch ponytail worth the hype?
- See your stitch ponytail come to life at Afro Magic Braiding
- Sources
- FAQ
How do you create a stitch braid ponytail step by step?
Getting a clean stitch ponytail comes down to prep, patience, and a light hand with tension. Here is the sequence most stylists follow, whether you are working with a friend at home or setting up for a salon visit.
- Detangle first. Work through natural hair with a wide-tooth comb, then blow-dry or stretch it so the strands lie flat for parting.
- Section with a rat-tail comb. Divide the hair into clean rows running from the hairline back toward the crown, keeping each part straight and even.
- Feed in the extension hair gradually. Start each stitch cornrow with your natural hair, then add small pieces of extension hair as you braid down the row, which keeps the base thin and reduces pulling.
- Build out the full head. Braid each row into the center point where the ponytail will sit, working from the front hairline back.
- Gather and secure. Once every row meets at the base, pull the braids into a ponytail and secure with a soft, seamless elastic rather than a tight rubber band.
- Wrap to finish. Take a small section of leftover braid or extension hair and wind it around the elastic, pinning the end underneath to hide the hardware.
A few things tend to trip people up along the way:
- Uneven parts usually mean the rat-tail comb tip needs to go deeper along the scalp before you start braiding.
- Frizz at the root often means the section was too big or the hair was not fully dry before braiding began.
Pro Tip: Braid the center rows first to build a fuller base, then feed in the side rows for symmetry and speed.
Supplies and prep for a longer-lasting result
The right materials make a real difference in how neat your ponytail looks and how long it holds up. Kanekalon-style synthetic braiding hair is the most widely available extension option, while human-hair blends give a softer, more natural movement at the ends.
- Tools: a rat-tail comb, sectioning clips, soft or seamless elastics, edge control, styling mousse, and a heat protectant if you plan to blow-dry beforehand.
- Natural hair prep: detangle, moisturize, and stretch the hair (via blow-dry or a light set) so it braids smoothly instead of bunching.
- Extension prep: some stylists lightly stretch or dip synthetic ends in warm water to soften texture and reduce shedding before installing.
Choose elastics without exposed metal, since metal clasps snag hair and cause breakage at the base over repeated wear.
Pro Tip: Keep a small tub of mousse on hand for edge smoothing between sections, it sets flyaways without weighing the braids down.
Styling variations that change the whole look
Small technique changes create very different finished styles, and most take only a few extra minutes once you know the pattern. Curly ends are achieved by leaving the last few inches of extension hair loose and setting them with rods or a curling iron, while straight ends stay sleek longer but need occasional touch-ups to prevent frizz.
- X-stitch and zigzag parts replace straight rows with angled or crisscrossed sections, giving the ponytail a more sculptural, feed-in braids look that catches the light differently.
- Triangular parting adds visual texture at the crown without changing the braiding technique itself.
- Face-framing pieces or curtain bangs can be left out during sectioning and styled separately for a softer finish.
- Two-tone extensions let you color-block the ponytail, pairing a natural shade at the root with a brighter tone toward the ends.
Feed-in techniques create a seamless transition between natural hair and extension hair compared with some traditional attachment methods, according to a Cosmopolitan tutorial on stitch braiding. For more finished examples, browse braided updo inspiration before your next appointment, and if you like pairing a fresh set with a full beauty look, nail art ideas for every occasion make a nice finishing touch.
How long do stitch braids in a ponytail actually last
Most people get several weeks of wear from a well-installed stitch ponytail before the new growth at the root makes it look less neat. Limiting continuous wear protects your scalp and reduces the chance of tension building up unnoticed.
- Night care: wrap the style in a satin scarf or bonnet before bed to cut down on friction and frizz.
- Product choice: use a light mousse rather than heavy oils near the scalp, since buildup at the base can contribute to thinning over time.
- Refresh the ends: dip synthetic ends briefly in warm water or smooth them with mousse to revive the look between full redos.
- Touch up edges: a small amount of edge control on the hairline, applied sparingly, keeps flyaways down without adding buildup.
- Know when to remove it: persistent pain, tension headaches, or visible thinning at the hairline mean it is time to take the style out, not push through it.
For a deeper walk-through of daily upkeep, see this guide to maintaining braids.
Tension, traction alopecia, and how to braid safely
Braiding should never hurt. Dermatologist Dr. Callender notes that pain during braiding is a reliable early indicator of traction alopecia, and that a braid causing real pain needs to be loosened, according to AAD News. Tight hairstyles, including ponytails and braids, can pull on the follicle enough to cause lasting damage if the tension is not addressed.
The American Academy of Dermatology recommends loosening braids at the hairline, choosing thicker feed-in sections over very thin ones, and limiting continuous wear to about 6 to 8 weeks to reduce the risk of traction alopecia. Keep edge control light at the scalp itself, since heavy product buildup at the root has been flagged by editorial styling guides as a contributing factor in thinning over time. If a style still hurts after adjustment, or if you notice thinning that does not grow back, it is worth talking to a dermatologist.

Salon-tested tips for a smoother install
Afro, who writes the styling guides behind Afro Magic Braiding's portfolio, recommends starting with fully detangled, product-free hair so the feed-in sections lie flat from the first row. The salon's preferred approach favors a tension-free feed-in, adding extension hair in small increments so the scalp never feels tight pulling.
For the ponytail base, a short wrap braid made from leftover extension ends winds around the elastic and pins underneath, hiding the hardware and taking direct pressure off the scalp. It is a small step, but it is the difference between a ponytail that looks finished and one that looks rushed.

Is the stitch ponytail worth the hype?
A stitch braid ponytail earns its popularity because it protects natural hair while still looking sharp for weeks. DIY works fine for a simple, straight-back install, but intricate parting or a flawless hairline is where a professional's hands matter. Whichever route you choose, comfort should never take a back seat to style.
— Afro
See your stitch ponytail come to life at Afro Magic Braiding
Skip the guesswork and let a braider who does this daily handle your tension, parting, and finish. Browse the braiding portfolio for real stitch-ponytail examples before you book.

- Bring reference photos of the parting pattern and length you want.
- Mention your desired wear time so your braider can adjust tension and section size accordingly.
- Book online or call ahead to reserve your appointment slot.
Sources
See the AAD hairstyle safety guidance and our braid damage prevention guide.
This article is general information, not a substitute for advice from a qualified doctor. Consult a qualified healthcare professional about your own circumstances before acting on anything here.
- AAD News — Hair loss in women tied to diseases (quotes from Dr. Callender)
- Cosmopolitan — X stitch braid ponytail tutorial
FAQ
What is a stitch ponytail?
A stitch ponytail is a style made from feed-in stitch cornrows that are braided toward a center point and gathered into one ponytail. The stitching pattern creates a smooth, raised line along each part before the hair is secured at the base.
How long can stitch braids last?
Stitch braids are generally worn for several weeks, with dermatologists recommending continuous wear of about 6 to 8 weeks at most to protect the scalp. Wearing them longer than that raises the risk of tension building up unnoticed at the roots.
How do you braid stitch braids?
Stitch braids are created using a feed-in technique, where small pieces of extension hair are added gradually into a cornrow started with your natural hair. This keeps the base thinner and the tension lighter than some traditional attachment methods, based on feed-in tutorials from Cosmopolitan.
How do you braid braids into a ponytail?
Once all the stitch cornrows are braided toward a center point at the back or crown, gather them together and secure them with a soft elastic. A small wrap of leftover braid or extension hair is then wound around the elastic to hide it and finish the base cleanly.
Can Afro Magic Braiding install a stitch ponytail for me?
Yes, the salon's ponytail service is available for 150 to 190 dollars depending on length and design. You can view finished examples on the portfolio page before booking.