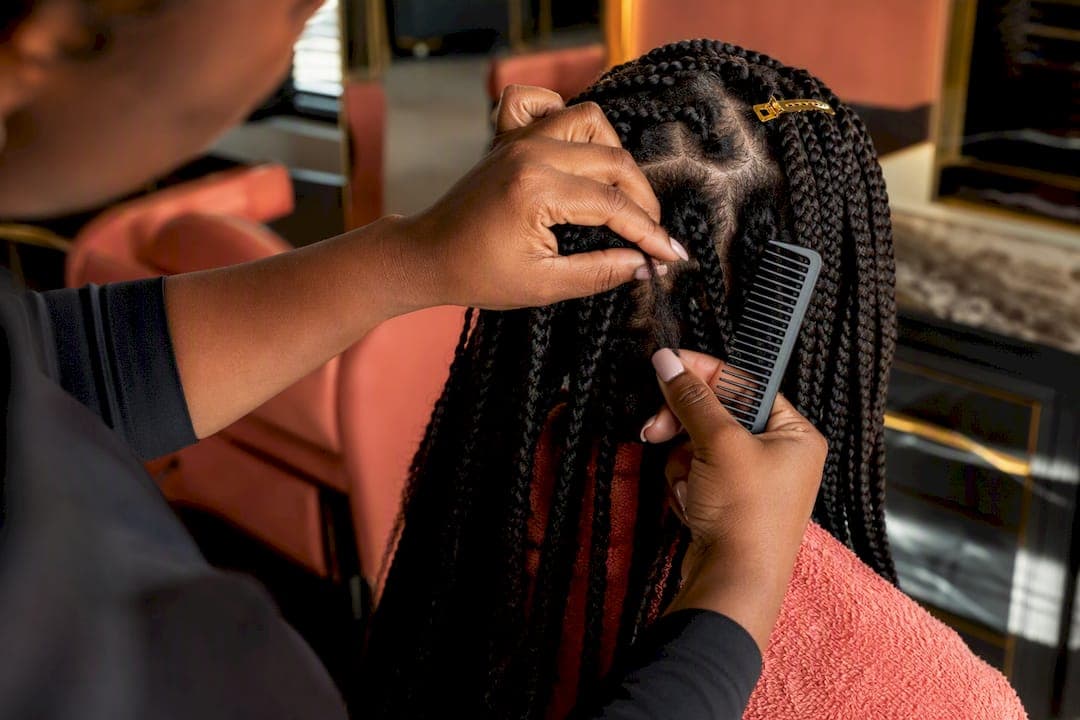
Rehydrate your braids with a leave-in or detangler first, then cut the synthetic braid tails just below your natural hair ends, and unravel each section slowly from ends to roots, detangling as you go. Plan for hours, not minutes. If you hit heavy matting or scalp pain, a professional takedown is worth the trip. Otherwise, here's exactly how to do it yourself without shredding months of growth.
TL;DR:
- Rushing the takedown process increases the risk of scalp damage, breakage near the roots, and unnecessary hair shedding, especially if you rush at the junction between synthetic and natural hair.
- Using sharp scissors below the natural hair end and detangling immediately after unraveling each small section can significantly reduce overall damage during removal.
- Small or micro knotless braids may take four to six hours to remove carefully, requiring breaks to prevent fatigue-related mishandling and breakage.
- Applying leave-in conditioner and re-misting sections that resist unraveling helps loosen synthetic hair, making the process smoother and safer.
- Seeking professional removal is recommended if scalp pain, matting, or thinning occurs, or if time constraints make careful takedown unsafe or impractical.
Table of Contents
- Knotless Braids Takedown: The Step-By-Step Method
- Tools and Products That Make a Real Difference
- What Actually Causes Breakage During Takedown
- Washing and Recovery After Takedown
- What a Salon Sees During Hundreds of Takedowns
- When to Book a Professional Takedown Instead
- Sources
- FAQ
Knotless Braids Takedown: The Step-By-Step Method
Knotless braids takedown rewards patience more than any other step in the protective styling cycle. The feed-in technique that makes knotless styles comfortable to install also makes them friendlier to remove, since there's no tight knot binding your natural hair to the extension at the root. That said, "easier" doesn't mean "fast." Rushing through takedown is the single most common reason people end up with a bathroom floor full of hair they didn't need to lose.
Set up your space before you touch a single braid
Pick a spot with strong, direct light. A window seat or a bathroom with a large mirror works better than a dim bedroom. Gather everything first: a wide-tooth comb, a tail comb, sharp scissors, sectioning clips, a spray bottle with leave-in conditioner or detangler, a couple of towels, and a timer or your phone. Block out several uninterrupted hours. If you're doing a full head of small or medium knotless braids, this is not a "before dinner" task.
- Saturate small sections with leave-in conditioner or detangler. Spray each section until it's noticeably damp, not just misted, and let it sit for 5 to 15 minutes before you start unraveling. Experts recommend this soak because dry synthetic hair grips natural strands and multiplies friction during unraveling.
- Reapply as sections dry out. If a section feels stiff or resistant after 20 minutes of work, mist it again before continuing. Dry hair is the reason takedowns that should take three hours stretch into six.
- Confirm your natural hair end before you cut anything. Pinch the braid a few inches down from the tip and feel where the texture changes from smooth synthetic fiber to your own curl pattern. That transition point is your natural end.
- Cut the synthetic tail below that point, never above it. Use sharp, dedicated hair scissors, not the kitchen shears in your junk drawer. Cutting cleanly below the natural hair end removes bulk length so you're unraveling a shorter braid, which cuts your total takedown time significantly.
- Isolate one braid or a very small cluster of two to three. Working section by section, rather than tearing through the whole head at once, prevents loose strands from tangling with hair from a neighboring braid.
- Pinch the cut end and loosen the first inch with your fingers. Once it starts to give, use the pointed tail of your comb to help guide the unraveling upward, twist by twist.
- Slow down dramatically as you approach the root. This is the extension-to-natural-hair junction, the point where synthetic fiber meets your own growth, and it's the single highest-risk zone for breakage in the entire process.
- Separate trapped natural hair from synthetic fiber using your fingers, not a comb. Combing directly through the junction while it's still tangled with extension fiber is how people rip out hair that was otherwise perfectly healthy.
- Detangle that section immediately, before moving to the next braid. Start with the wide-tooth comb at the very ends and work upward in small strokes, never yanking from root to tip.
- Twist or clip the section once it's smooth. Two-strand twist it loosely or clip it up and out of the way so it can't re-tangle with sections you haven't reached yet.
Working in small sections and detangling immediately is what separates a clean takedown from a matted, frustrating one. Skip that discipline, and shed hair from five different braids ends up knotted together in one impossible clump.
How long should this actually take?
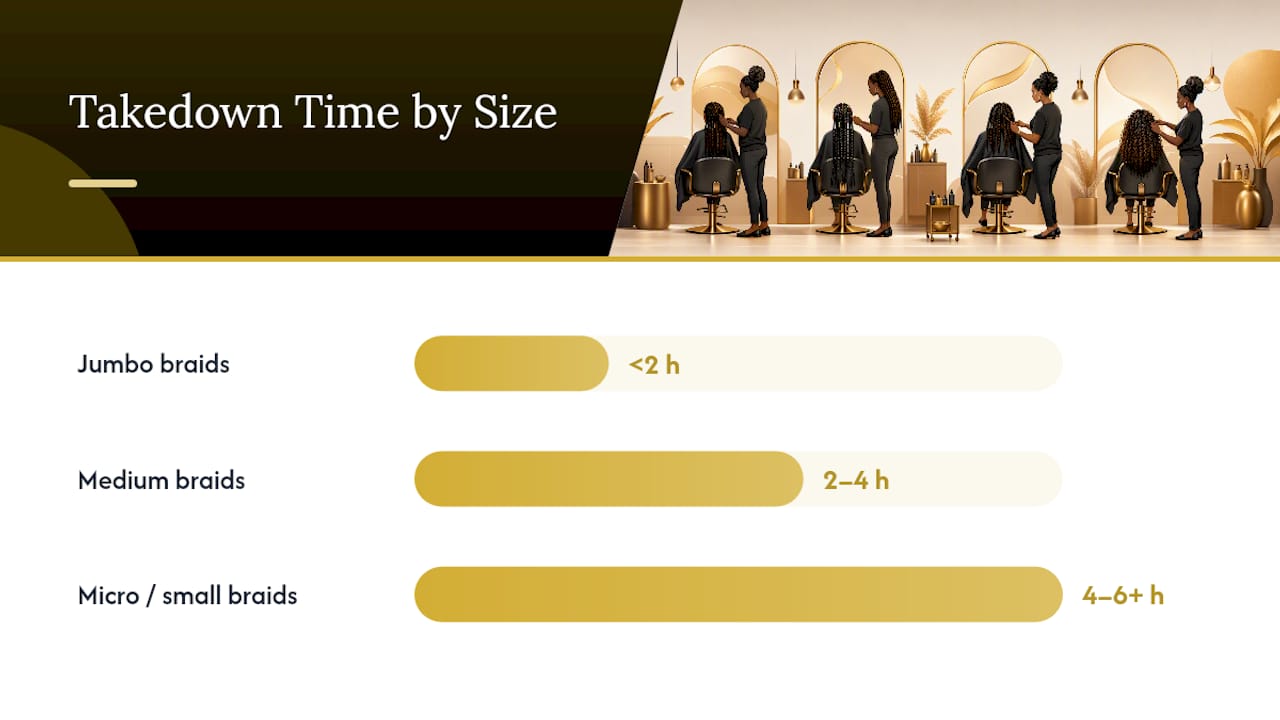
Time budgets shift dramatically based on braid size, and pretending otherwise sets you up for frustration. Micro or small knotless braids, the kind with hundreds of individual braids, can run four to six hours or longer because there's simply more root junctions to work through carefully. Medium knotless braids typically land in the two to four hour range. Larger, jumbo knotless styles often come down in under two hours since there are fewer total sections, even though each one is thicker.
Build in real breaks. Sit for 45 minutes, then stand, stretch your hands, and reset before continuing. Fatigue is when people start combing too aggressively or skipping the detangle-as-you-go step just to see progress faster, and that's exactly when avoidable breakage happens.
Pro Tip: Do your takedown the night before wash day, not the morning of. That gap gives you a natural excuse to slow down instead of racing the clock before an appointment or event.
Some people supplement hand unraveling with a tool designed to speed the process along, and tools like the Original Unbraider can genuinely cut down your total time. Just don't let speed become the goal at the junction. A faster tool is only helpful if you still slow down at the root.
Tools and Products That Make a Real Difference
The right supplies turn a knotless braids takedown from a wrestling match into a manageable afternoon project. You don't need a salon's full inventory, but a few specific items earn their place.
- Sharp hair-cutting scissors, reserved only for trimming braid tails below the natural hair end, never for anything else in your house.
- A metal or hard-plastic tail comb, whose pointed end helps loosen the first stubborn inch of a freshly cut braid without snagging it.
- A wide-tooth comb, which detangles ends and roots with far less mechanical stress than a fine-tooth comb or a brush ever could.
- Sectioning clips, so completed sections stay twisted and out of the way instead of drifting back into the mess.
- A lightweight leave-in conditioner or detangling spray with a low-residue formula, since heavier creams can leave buildup that makes your later wash harder.
- A light oil for the scalp and root area, applied sparingly to reduce friction right at the junction where breakage risk is highest.
- A clarifying shampoo and a deep conditioner or mask, both waiting for the moment takedown ends and recovery begins.
Choosing between a light oil and a heavier butter matters more than people realize, especially around fragile edges. Heavier products can weigh down fine edge hair and make it feel more matted during detangling, while a lighter oil, like a grapeseed or jojoba blend, lubricates without adding drag. If your edges are already thin or stressed, that difference between leave-in and rinse-out formulas is worth thinking through before you start spraying product on your whole head.
Skip the temptation to use a razor or a box cutter for speed. Scissors give you control, and control is the entire point of a safe takedown.
What Actually Causes Breakage During Takedown
Rushing is the single biggest cause of mechanical breakage during a knotless braids takedown, and it's not close. Professional braiders consistently point to speed and rigid handling as the pattern behind avoidable hair loss, more than any product choice or tool. The junction between synthetic fiber and natural hair is where that rushing does the most damage, because that's the one spot where your own growth is directly bearing the tension.
Cutting too high is the second recurring mistake, and it usually happens because someone estimates the natural hair end instead of physically checking it. Take the extra ten seconds to pinch the braid and feel where texture changes before every single cut. A scissor slip an inch too high on even a handful of braids adds up to visible breakage you'll notice weeks later.
The third mistake is trying to remove every braid before detangling any of them. It feels efficient in the moment, but it's exactly backward. Once you've unraveled ten or fifteen braids without securing them, shed hair from each one starts mixing together into a single mass that's far harder to sort through than any individual section would have been.
If you get stuck on a stubborn knot near the root, don't force it. Reapply leave-in conditioner directly to that spot, wait a few minutes, and try again with your fingers before reaching for a comb. And if your arms are tired or your patience is running thin two hours in, it's completely reasonable to ask a friend to take over one side of your head while you work the other. Two sets of slower, calmer hands beat one set of rushed ones every time.
— Afro
Washing and Recovery After Takedown
Detangling doesn't stop once the last braid is out. Work through your hair in the same small sections you used during takedown, combing from ends to roots with a wide-tooth comb, then securing each finished section with a loose two-strand twist. This keeps newly freed hair from re-tangling with sections you haven't reached yet.
- Wash with a clarifying shampoo to strip out days or weeks of product buildup, oil, and residue that accumulated under the braids. A stepwise wash-day routine that moves section by section, rather than dumping shampoo on a loose head of hair, keeps tangling to a minimum.
- Deep condition generously. Apply a rich mask, cover with a plastic cap, and sit under low heat, or simply wait the time your product recommends, before rinsing thoroughly.
- Follow with a lightweight leave-in while hair is still damp, focusing on the ends where the most mechanical stress occurred during unraveling.
- Protect your edges for the next few weeks. Skip tight ponytails or slicked styles immediately after takedown, and give edge hair time to recover before putting it under tension again.
- Sleep on satin or silk. A satin bonnet or a silk pillowcase cuts down on the friction that undoes days of careful moisture work overnight.
Pro Tip: If your hair still feels tangled after a full wash and deep condition, don't fight it dry. Apply conditioner again, comb through in the shower with slip on your side, and rinse once it moves freely.
Get on a regular moisturizing schedule in the weeks that follow, refreshing ends every few days rather than waiting until hair feels completely dry. If you notice visible breakage, unusual thinning, or hair that snaps rather than stretches when pulled gently, that's your signal to book a trim or a professional consultation rather than pushing through on your own.
What a Salon Sees During Hundreds of Takedowns
Two-person takedowns aren't a luxury for the sake of speed alone. Braiders working on larger heads or longer, smaller braids often split the head between two sets of hands, which keeps momentum steady and reduces the fatigue-driven mistakes that show up in hour four of a solo effort.
Time benchmarks vary the same way they do at home: small or micro knotless braids run longest, medium sizes fall in the middle, and jumbo styles come apart fastest, purely because there are fewer individual sections to work through. What differs at a salon is what happens after the last braid comes out. A recovery appointment typically includes a deep conditioning treatment and, when edges show signs of stress, a targeted repair step rather than a generic wash.
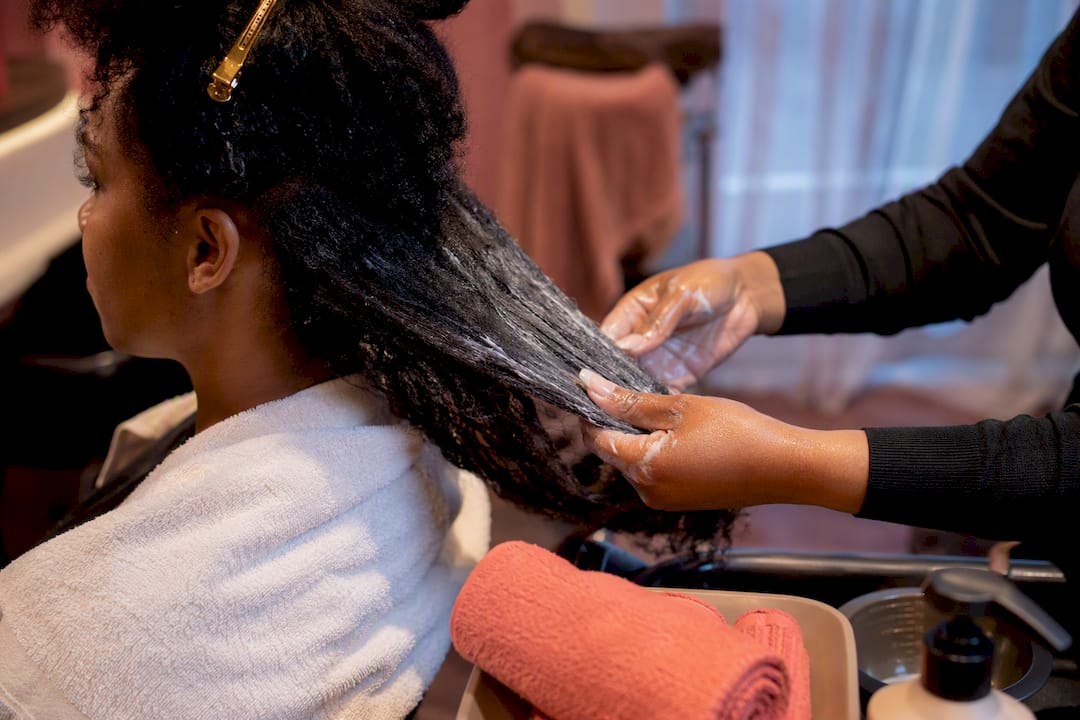
Clients who come in with heavily matted sections or scalp tenderness are usually the ones who waited too long between installs or skipped moisture maintenance during the wear. A professional take on that situation isn't about judgment. It's about knowing when hands-on experience saves length that a rushed DIY session would have cost.
When to Book a Professional Takedown Instead
There's a real difference between a takedown that's slow because you're being careful and one that's slow because something's gone wrong. Severe matting, scalp pain when you touch certain sections, or visible thinning at the root are all signs that a DIY approach could do more harm than good at this point. If you simply don't have several free hours to give it, that's a legitimate reason too. A rushed takedown under time pressure is worse than no takedown at all that day.
A salon handles both sides of this job: taking down knotless braids that have reached the end of their wear and getting your natural hair ready for whatever comes next, whether that's a fresh install or a stretch of wearing your hair loose. A professional takedown session typically runs faster than a solo DIY attempt on the same braid size, and it often includes options for a deep conditioning or edge recovery treatment during the visit, which matters most for hair that's already showing stress.
Booking is straightforward. Browse the full range of protective styles in the braiding portfolio if you're planning a new install right after takedown, or head straight to book an appointment if you know you want a clean, low-risk removal handled by someone who does this every day. If matting or breakage has you worried, reach out through the contact page before your visit so the team knows what to expect and can plan the right recovery add-ons in advance.
Sources
This guide draws on expert takedown guidance from Byrdie, breakage-prevention tips from HotBraids, aftercare steps from Natural Hair Mag, and tool guidance from The Unbraider. For more on avoiding tangles before they start, see preventing braid damage.
- How To Take Down Your Braids, According to Experts
- Knotless braid takedown & wash day routine | Aftercare for natural hair
- How to Remove Braids and Twists Without Breakage: 8 Tips for Healthy Hair and Length Retention - HotBraids
- Fast braid takedown: The Original Unbraider
FAQ
What is the best way to take down knotless braids?
Soften each section with a leave-in conditioner, cut the synthetic tail below your natural hair end, then unravel small sections from ends toward roots, detangling immediately as you finish each one.
When should you take down knotless braids?
Most people remove knotless braids after a moderate number of weeks, or sooner if you notice significant new growth at the root, matting, or scalp discomfort that suggests the style has run its course.
What is a braid takedown?
A braid takedown is the process of removing braided extensions, cutting the synthetic hair, unraveling each section, and detangling your natural hair underneath before washing and conditioning it.
What are the downsides of wearing knotless braids?
Knotless braids can still cause tension damage or scalp irritation if installed too tightly, and takedown itself carries a real risk of breakage at the root if it's rushed or handled with a comb instead of your fingers at the junction. Choosing a shop with strong reviews, like the ones on Afromagicbraiding's reviews page, can lower that risk from the install side.
How much does a professional braid takedown cost?
Pricing depends on braid size and condition, and current rates are listed directly on the Afromagicbraiding portfolio page.