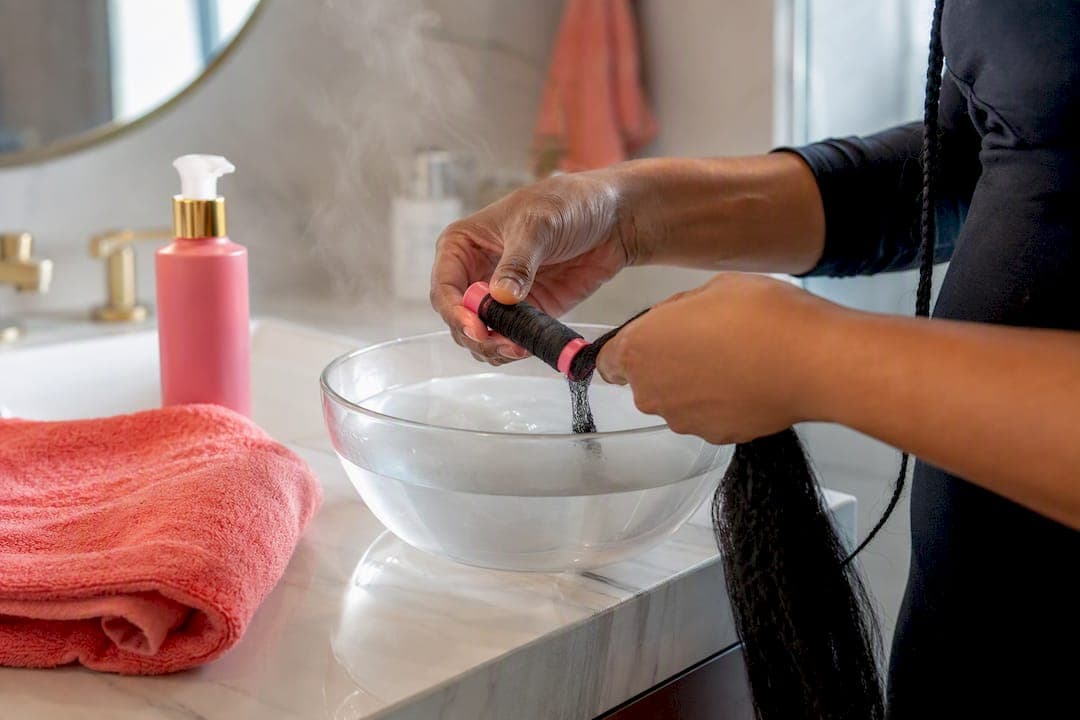
Hot water setting seals and smooths synthetic braid ends by softening the fiber just enough to reshape it, and it works because most braiding hair is heat-reactive by design. You use hot water, not boiling water, target 140°F to 160°F, dip for short bursts, and hold the strand with a stable, handled container. This technique works on synthetic fibers like kanekalon and toyokalon. It does not work the same way on human hair, which needs different heat tools entirely.
Before you touch a kettle, know the two things that actually matter here: your safety and your hair's fiber type. A rolling boil scalds skin in seconds and can melt certain synthetic strands into a stiff, waxy mess that won't soften again.
Two things to do right now, before anything else:
- Test one loose strand of your braiding hair in hot water first, and watch how it reacts before committing your whole head.
- Gather a heat-safe pitcher with a handle, a thick towel, and gloves so you're not improvising mid-process.
Key Takeaways
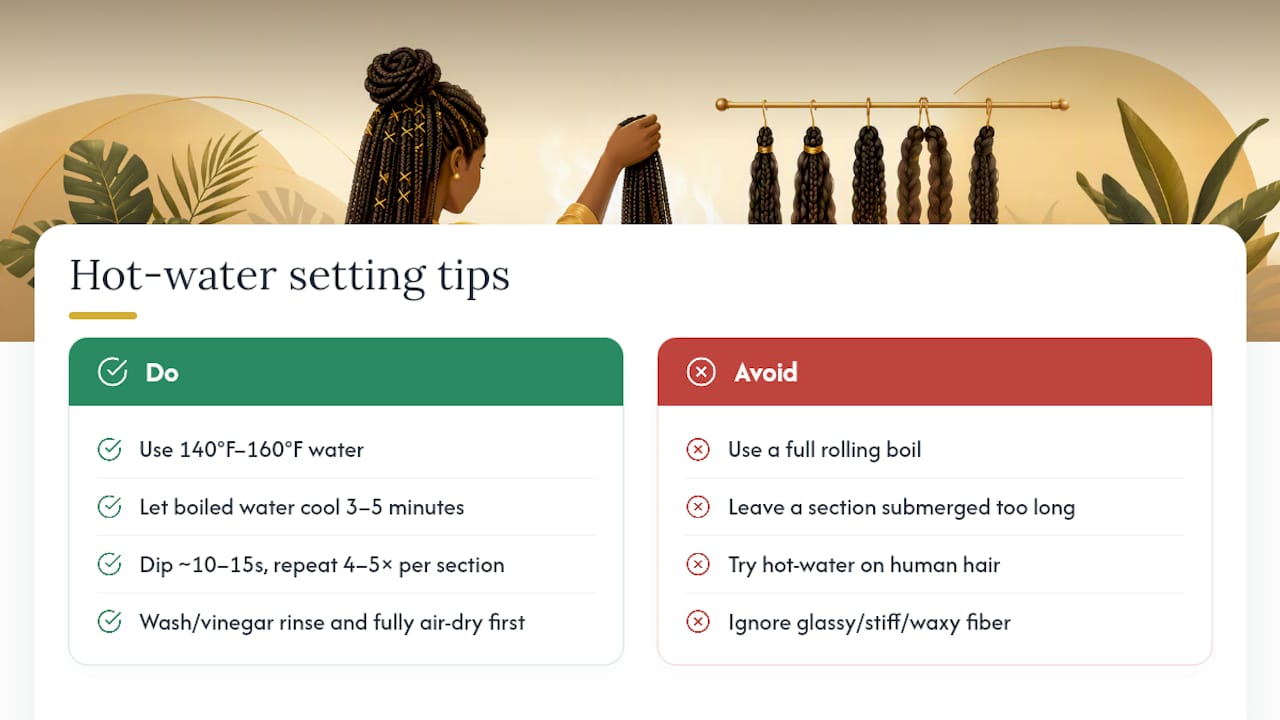
A safe hot water set uses 140°F to 160°F water, 10 to 15 second dips repeated four to five times, and a stable handled container to seal synthetic braid ends without burns or fiber damage.
| Point | Details |
|---|---|
| Stay in the safe range | Target 140°F to 160°F water, not a rolling boil, to reshape fiber without melting it. |
| Test before you commit | Dip one loose strand first to confirm how your specific hair fiber reacts. |
| Time your dips | Hold each section in the water for 10 to 15 seconds, repeating four to five times. |
| Protect your skin | Use a handled container, gloves, a waterproof cape, and a thick towel every session. |
| Book it when unsure | Afro Magic Braiding offers professional hot water finishing with pre-tested hair for a safer, cleaner result. |
Table of Contents
- How to Hot Water Set Braiding Hair: Tools and Prep
- Step-by-Step: How to Hot Water Set Braiding Hair
- How to Avoid Scalds and Protect Your Hair Fibers
- Fixing Common Hot Water Setting Mistakes
- Aftercare That Keeps Your Set Looking Fresh
- Why Afro Magic Braiding Trusts This Method
- Should You DIY or Book a Professional Finish?
- Get a Professional Hot Water Finish at Afro Magic Braiding
- Frequently Asked Questions
- Sources
How to Hot Water Set Braiding Hair: Tools and Prep
Getting the setup right matters more than the dip itself. Rushed prep is where most burns and fiber mishaps happen, not the actual dunking.
Here's what you need on hand before you boil a single cup of water:
- A heat-safe container with a secure handle — a kettle, a small pitcher, or a deep mug works. Avoid open pots you'd have to tilt and pour from directly onto hair near your scalp.
- A thermometer or a reliable timing method if you don't own one (letting boiled water sit for 3 to 5 minutes typically brings it into a workable range).
- Gloves or tongs to handle sections without exposing bare skin to steam or splashes.
- A waterproof cape and a thick towel to protect clothing and catch drips.
- Sharp scissors for trimming stray fibers after the set.
- A lightweight braid spray or mousse for smoothing flyaways once the ends are dry.
Before dipping anything near your scalp, wash your braiding hair. Some synthetic extensions carry manufacturing residue, and WebMD notes that testing on synthetic braiding hair has turned up contaminants that can release compounds when heated. A simple soak using two parts water to one part vinegar, followed by a rinse and full air-dry, cuts that risk down considerably.
Once your hair is clean and dry, detangle thoroughly and stretch your extensions using banding or a low-heat blow-dry before installing. Stretched, tangle-free hair dips more evenly and won't clump into uneven, half-set sections. If you haven't stretched your extensions yet, this guide on stretching braiding hair walks through the banding method step by step. Finally, section your braids into small, manageable batches (six to eight braids per round is reasonable) instead of trying to dip an entire head at once.
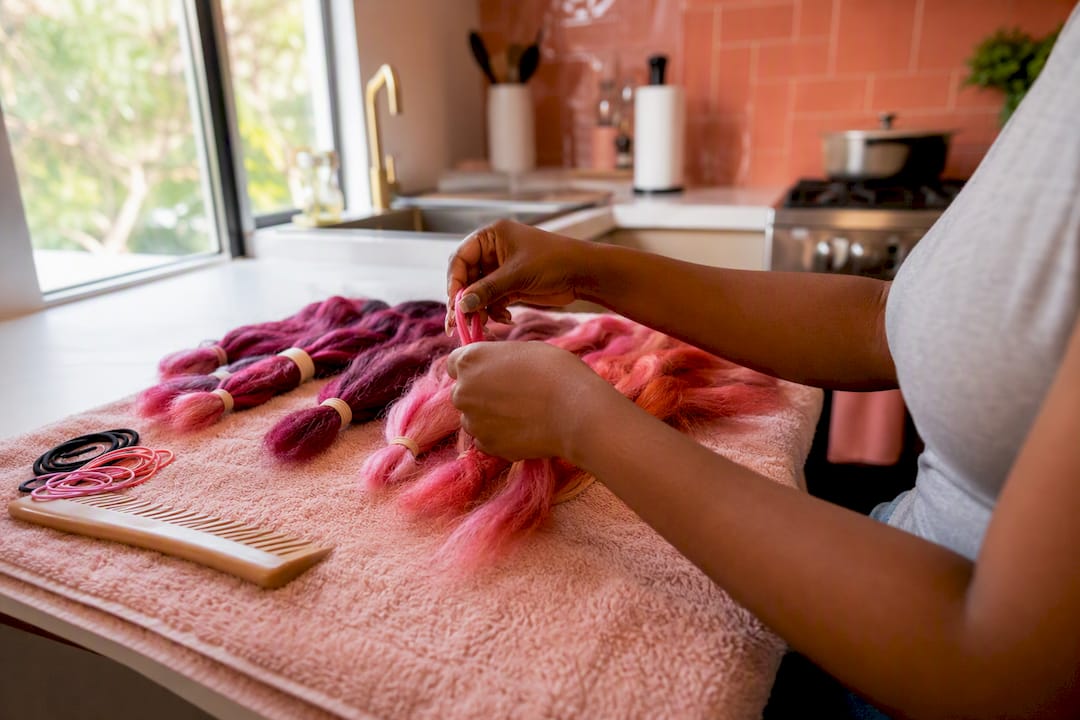
Pro Tip: Keep a second bowl of room-temperature water next to your hot water station. If a section feels too soft or a burn risk pops up, you can cool it down fast without scrambling for the sink.
Step-by-Step: How to Hot Water Set Braiding Hair
Bring water to a boil, then let it sit for 3 to 5 minutes off the heat. A rolling boil is unnecessary and genuinely risky. Children's Wisconsin's guidance on safe hair dipping points to a target window of about 140°F to 160°F (60 to 70°C), which is hot enough to reshape most heat-reactive synthetic fibers without needing near-boiling temperatures that raise your burn risk for no real styling benefit.
Once your water has cooled into that range, work through your sections in this order:
- Pour the hot water into your handled container. Never work directly from the pot. A pitcher or kettle gives you control over the pour and keeps your hand away from the opening.
- Gather one small section of braids, holding them taut from about an inch above where the natural hair ends. This keeps hot water off your scalp.
- Dip the ends into the water for roughly 10 to 15 seconds. Procedural guides on setting braids commonly recommend this window, repeated for four to five dips total, which is usually enough to feel the fiber shift from crisp to smooth without overexposing it.
- Pull the section out and give it a quick shake to knock off excess water, then immediately press it into a folded towel to blot, not rub.
- Move to the next section before the water cools too far below your target range. Reheat a small amount as needed rather than letting the whole batch sit lukewarm.
- Check the result. Ends should feel smooth, slightly firmer, and less prone to fraying. If they still feel loose or fluffy, a second short dip is fine. If they feel stiff, waxy, or oddly hard, stop. That's a sign the fiber has taken on too much heat.
For tighter curls or waves rather than a straight seal, some stylists dip the ends around a perm rod before submerging, holding the shape in the water for the same 10 to 15 second window, then letting it cool fully around the rod before releasing. Testing on curly braiding hair fibers shows that dip depth and exposure time directly affect how tight or loose the resulting wave pattern turns out, so a slightly longer dip loosens a tighter curl pattern, while a shorter one preserves more of the original texture.
Quick reference: Most stylists find that a 140°F to 160°F water temperature paired with 10 to 15 second dips, repeated four to five times per section, produces a consistent, damage-free set across common synthetic fibers.
Know when to stop. If you're seeing the fiber turn glassy, clumping together into a hardened mass, or giving off any burning smell, that section is done and possibly compromised. Trim it rather than trying to reshape it further. Braiding hair doesn't recover once it's melted, and pushing past that point wastes both time and material.
How to Avoid Scalds and Protect Your Hair Fibers
Burns from hair dipping are common enough that Children's Wisconsin has documented real scald incidents tied specifically to this technique, most involving hot water poured or splashed from unstable containers. The fix isn't complicated, but it does require you to slow down and set up properly before you start.
Letting boiled water cool for 3 to 5 minutes before use, working from a small handled container instead of an open pot, and draping a waterproof cape with a thick towel underneath are the core protections that separate a safe dip session from a trip to urgent care.
Build your workspace around these non-negotiables:
- Work over a sink or a surface you don't mind getting wet, never over carpet or upholstery.
- Wear gloves, especially if you're dipping your own hair without a helper to hold sections steady.
- If you're setting a child's braids, have a second adult present to manage the water while you handle the hair.
- Keep a cool water bowl within arm's reach for an immediate rinse if hot water touches skin.
- If a minor scald happens, run cool (not ice-cold) water over the area for several minutes and avoid applying anything but a clean, dry cover afterward.
Boiling water offers no styling advantage over the 140°F to 160°F range, and it dramatically raises both burn risk and the chance of melting your fiber into an unworkable state. There's no version of this method where hotter is better.
Fixing Common Hot Water Setting Mistakes
Even with careful prep, things go sideways sometimes. Knowing what caused the problem saves you from repeating it on your next section.
Limp or melted ends almost always trace back to water that was too hot or a fiber that wasn't heat-reactive in the way you expected. Some hair labeled "heat-resistant" tolerates higher temperatures, but common fibers like kanekalon and toyokalon respond best within that 140°F to 160°F window, and testing a small strand first catches this before it ruins a full head. If ends have already gone stiff and waxy, trim them off. They won't soften back to normal.
Frizz after the dip usually means the section dried unevenly or got roughed up during the towel-blot step. Squeeze (don't rub) a damp towel over the affected area, apply a small amount of mousse, and tie the section down with a satin scarf while it finishes drying.
A few variations worth knowing:
- Pre-install dipping (setting the hair before you braid it in) gives you more control and less risk near the scalp, but it takes more time upfront.
- Post-install dipping finishes a completed style faster but requires more caution around the root area.
- Shorter, shallower dips preserve more curl definition; deeper, slightly longer dips smooth the fiber into a straighter finish.
Aftercare That Keeps Your Set Looking Fresh
The first 24 to 48 hours after a hot water set matter more than people expect. Heavy water exposure during that window, think a long shower with your head fully under the spray, can loosen the set before the fiber has fully stabilized.
Small habits from here carry the style for weeks:
- Sleep in a satin scarf or bonnet every night to cut down on friction and frizz.
- Every two to three weeks, do a light cleansing routine on your scalp using a diluted shampoo, focused at the roots rather than saturating the whole braid.
- Use a lightweight braid spray rather than heavy creams, which build up and attract lint over time. Practical braid maintenance routines consistently point to lighter products as the better long-term choice for scalp health.
- Refresh frizzy ends with a very brief, low-temperature re-dip rather than a full redo.
- If you notice persistent itching, visible buildup, or the braids loosening significantly at the root, it's time to take them down.
For a deeper maintenance routine, this guide on braid care through the year covers product rotation and scalp health in more detail.
Why Afro Magic Braiding Trusts This Method
Salon-tested technique looks a lot like what's outlined above, just executed with more repetition and tighter control over batch size. Stylists rely on a few core habits that hold up whether you're doing one client's braids or fifty:
- Test a small strand before committing to a full head, every single time, regardless of how familiar the hair brand seems.
- Measure water temperature when a thermometer is available rather than eyeballing it.
- Work in small, controlled batches instead of trying to dip large sections at once, which keeps burn risk low and results consistent.
- Choose pre-tested, higher-quality hair whenever possible, since fiber quality directly affects how predictably it reacts to heat.
These aren't shortcuts. They're the difference between a set that holds for weeks and one that frizzes out in three days. For finishing touches on stubborn ends, some stylists also reach for a specialized product like QAI Liquid Hair, which is built specifically for sealing synthetic braid ends without a full water dip.
Should You DIY or Book a Professional Finish?
Comfortable handling hot water, confident in your fiber type, and setting your own hair (not a child's)? A home hot water set is a reasonable weekend project. But if you're installing a full new style, working with a fiber you haven't used before, or setting braids for a child, booking a professional finish removes the guesswork and the risk entirely.
A trained stylist controls water temperature, batch size, and dip timing with far more precision than most first-timers manage on try one, and that precision is what keeps both your scalp and your hair fiber intact.
Get a Professional Hot Water Finish at Afro Magic Braiding
If reading through timing windows and temperature ranges made you realize you'd rather have trained hands on this part, that instinct is a good one. Afro Magic Braiding builds every install around the same safety-first principles covered here, using pre-tested, premium hair and controlled finishing techniques so your ends come out sealed and smooth without any guesswork on your end.

Our stylists measure water temperature, work in small batches, and check fiber reaction before ever touching your full head, the same salon-tested checklist described above, just done by someone who does it daily. Browse our finished braid styles in the portfolio to see the kind of clean, defined ends this method produces when it's done right. Ready to skip the kitchen setup and the safety math? Book your appointment and let us handle the hot water part.
Frequently Asked Questions
What temperature water should I use to set braiding hair? Aim for 140°F to 160°F. Let boiled water cool for 3 to 5 minutes before you dip anything, since a full rolling boil raises both burn risk and the chance of melting your fiber.
How long do I dip braids in hot water? Roughly 10 to 15 seconds per dip, repeated four to five times per section, is the range most procedural guides and salon practices land on.
Does hot water setting work on human hair braids? No. This method is built for heat-reactive synthetic fibers like kanekalon and toyokalon. Human hair needs different heat styling tools entirely.
Can hot water damage my braiding hair? Yes, if the water is too hot or a section stays submerged too long. Fiber that turns glassy, stiff, or waxy has taken on too much heat and won't reshape back to normal.
Do I need to wash synthetic hair before dipping it? Washing first is a smart step. Some synthetic hair carries manufacturing residue, and a quick vinegar soak followed by a rinse and full air-dry reduces that risk before any heat touches it.
Sources
This guide draws its safety and technique details from a mix of medical, product-safety, and hands-on styling sources:
- Braids not burns: How to dip and seal braids safely | Children's Wisconsin
- Hair braiding: What to know | WebMD
- How to Set and Maintain Braids (Dip and Seal Braids) | wikiHow
- Hot Water Dip: Styling Curly Braiding Hair Made Easy | ShunSalon