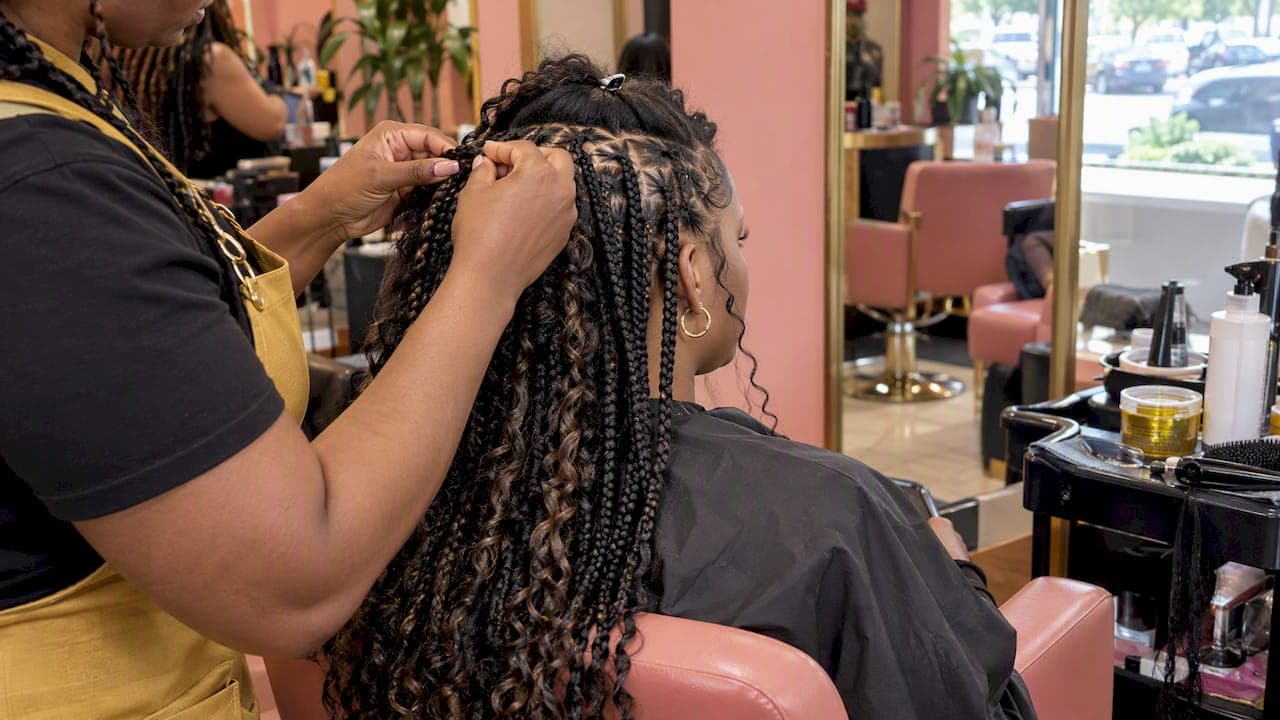
Goddess box braids are a box-braid base finished with loose, curly tendrils or curly ends for a soft, bohemian look, and they count as a protective style when installed without excessive tension. They work best for anyone chasing a textured, romantic alternative to classic box braids while still shielding natural hair underneath. Most salons install them knotless or with a crochet technique for faster, gentler results.
TL;DR:
- Knotless installation reduces scalp tension and is ideal for sensitive hairlines, but it generally costs more and takes longer.
- Style longevity typically ranges from three to six weeks, with longer wear increasing risks of matting, scalp strain, and tension alopecia.
- Synthetic curly hair is budget-friendly but tangles faster, while human hair blends more naturally and withstands heat styling better.
- Most installs take five to ten hours and cost between $190 and $300, depending on hair type, braid size, and length.
- A daily routine of misting curls, gentle scalp cleaning, and avoiding heavy products helps maintain curl definition and scalp health.
Table of Contents
- What makes goddess box braids different from boho and standard box braids
- Styling ideas and quick inspiration for your next install
- Knotless, crochet, and feed-in: comparing installation methods
- Installation time, cost, and how long the style lasts
- Care, maintenance, and scalp safety for lasting curls
- Afro's salon-tested tips for a smoother, safer install
- When a salon visit beats a DIY crochet hack
- Book your goddess braids at Afro Magic Braiding
- FAQ
- Sources
What makes goddess box braids different from boho and standard box braids
A goddess box braid starts exactly like a standard box braid: sectioned, parted, and braided down the length of the hair. The difference shows up at the ends, or sometimes throughout the braid, where curly human or synthetic hair is left loose to mimic natural curl pattern. That curl placement is what gives the style its name and its signature movement.
Boho braids and goddess braids are close cousins. Both incorporate curly pieces for an effortless, textured aesthetic, but the terms get used almost interchangeably depending on the salon. The practical differences usually come down to where the curls sit and how thick the braids are:
- Standard box braids: uniform, sleek braids with no curl insert, lowest maintenance.
- Goddess box braids: braided base with curly tendrils woven in or left at the ends for a softer finish.
- Boho braids: curls distributed more loosely throughout the braid, often with thinner parts for a fuller, wild look.
Human hair tends to blend more naturally and survives heat styling, while synthetic curly hair is more budget-friendly but tangles faster, especially with daily friction from pillows or hats. For more on how the two styles compare side by side, our breakdown of boho vs. goddess braids covers the maintenance trade-offs in detail.
Styling ideas and quick inspiration for your next install
Goddess box braids flex easily between casual and dressed-up, which is part of why they stay popular. Here are ten looks worth saving or showing your stylist before your appointment.
- Half-up top knot: pulls face-framing pieces back while letting curls cascade below.
- Crown halo braid: wraps one braid around the crown for an instant, no-effort finishing touch.
- Low bun with curls out: sleek at the base, soft at the ends.
- Long loose boho waterfall: best with medium parts and dense curl placement for volume.
- Side-swept over one shoulder: flattering for photos and evening wear.
- Braided ponytail with curly tail: practical for workouts, still styled.
- Face-framing curly tendrils: small front sections left curly while the rest stays sleek.
- Cuffs and beads accent: adds shine and sound, best on thicker braids.
- Layered lengths: shorter curls near the crown, longer ones toward the back.
- Curly ends only, no mid-braid curls: the lowest-maintenance variation for first-timers.
Smaller parts create a fuller, more boho effect, while larger parts keep things quicker to maintain. For evenings, swap a loose half-up for a sleeker bun. A light mist of water refreshes curl definition between wears.
Pro Tip: Bring two reference photos to your appointment, one for parting size and one for curl placement, so your stylist can match both in one sitting.

Knotless, crochet, and feed-in: comparing installation methods
Each method changes how the braid starts at the root, which affects comfort more than anything else.
- Knotless braids: hair is fed in gradually from the root with no knot, reducing tension at the scalp and making this the gentlest option for sensitive hairlines.
- Crochet (miracle knot) method: curly pieces are looped in with a crochet hook after the base braid, which speeds up install time and works well for DIY touch-ups.
- Traditional feed-in box braids: hair is added in at the start with a small knot, which can pull more at the root if done too tightly.
Knotless installs tend to cost slightly more and take longer, but they are worth it for anyone prone to tenderness or thinning edges. Crochet methods suit people who want a faster, lower-cost refresh or a DIY option between salon visits. Decide ahead of time whether you or the salon supplies the hair, and request human hair for leave-out curls if you plan to heat style or have a sensitive scalp, since it causes less friction than synthetic strands.
Installation time, cost, and how long the style lasts
Plan for a real time commitment. Boho and goddess-style installs commonly take five to ten hours depending on length, density, and braid size, and that window can stretch further with very long hair or intricate curl placement.
- Time: typically five to ten hours, longer for waist-length styles or dense curl patterns.
- Lifespan: stylists recommend wearing the style for three to six weeks before removal to limit buildup and scalp strain.
Wearing goddess braids past that six-week window raises the risk of matting at the roots and added stress on the scalp, so plan your removal date when you book.
Care, maintenance, and scalp safety for lasting curls
A simple daily routine keeps curls looking fresh without unraveling the braid underneath.
- Daily refresh: mist curls with water and a leave-in spray, finger-separate gently, and sleep in a silk or satin bonnet.
- Weekly scalp care: cleanse lightly at the roots with a diluted shampoo or scalp cleanser, and apply a light oil only where the scalp feels dry.
- Avoid buildup: skip heavy creams near the roots, since residue speeds up frizz and tangling at the curly ends.
Watch for tension warning signs. Persistent pain, pimples along the hairline, or visible hairline recession are early signs of traction alopecia, a form of hair loss caused by chronic pulling that can become permanent if ignored. If you notice these signs, ask your stylist to loosen the affected braids or remove them early rather than waiting out the full six weeks. For a deeper walkthrough of daily upkeep, see our guide on tangle-free care for boho and goddess styles.
Afro's salon-tested tips for a smoother, safer install
Before your appointment, wash and deep-condition your hair, stretch it with a blow-dry or light braid-out, and bring two or three reference photos. Decide in advance whether you or the salon will supply the curly hair, since human hair handles heat and blends more naturally.

When you sit down in the chair, use specific language: ask for a "knotless feed-in" for sensitive edges, or a "crochet miracle knot" if you want faster curly ends. Request light tension at the perimeter specifically, since that's where most discomfort starts. A good stylist can re-tension a section or remove a problem braid cleanly without ripping, so speak up the moment something feels off.
Pro Tip: Say the words "light tension at the edges" out loud during your consultation. It's the single phrase that gets stylists to adjust technique before they start.
When a salon visit beats a DIY crochet hack
Full installs, intricate parting, or thin, fragile edges call for a professional who can control tension precisely. DIY crochet hacks work fine for simple curly-ends touch-ups or when time and budget are tight.
Either way, the same rule applies: if you feel pain during or after installation, loosen the braid immediately. Comfort is not negotiable, no matter who does the braiding.
— Afro
Book your goddess braids at Afro Magic Braiding
We install goddess, knotless, and crochet braids with tension-aware techniques using hair sourced for softness and strength. 
Browse real finished looks in our portfolio, including goddess box braids, boho styles, and crochet work, then reach out through our booking page to lock in your appointment and talk through curl placement, hair type, and timing before you sit in the chair.
FAQ
What is the difference between goddess braids and box braids?
Standard box braids are uniform and sleek with no curl insert, while goddess braids add curly tendrils woven into the braid or left loose at the ends for a softer, more bohemian finish. Both start with the same braided base technique.
How long will goddess braids last?
Most stylists recommend wearing goddess braids for three to six weeks before removal to avoid buildup and scalp strain. Wearing them longer increases the risk of matting and tension at the roots.
Which is better, boho or goddess braids?
Neither style is objectively better. Boho braids distribute curls more loosely throughout the braid for a fuller look, while goddess braids concentrate curls at the ends or in select sections, so the right pick depends on how much curl texture you want.
How much do goddess braids usually cost?
Our Goddess Braids service runs $190 to $300, with the final price shifting based on hair type, braid size, and length. Pricing elsewhere varies by salon, hair type, and region.
Sources
- Traction alopecia - StatPearls / NCBI Bookshelf
- The ultimate boho braids guide—From install to maintenance
- Boho braids give classic box braids an effortless upgrade | Allure