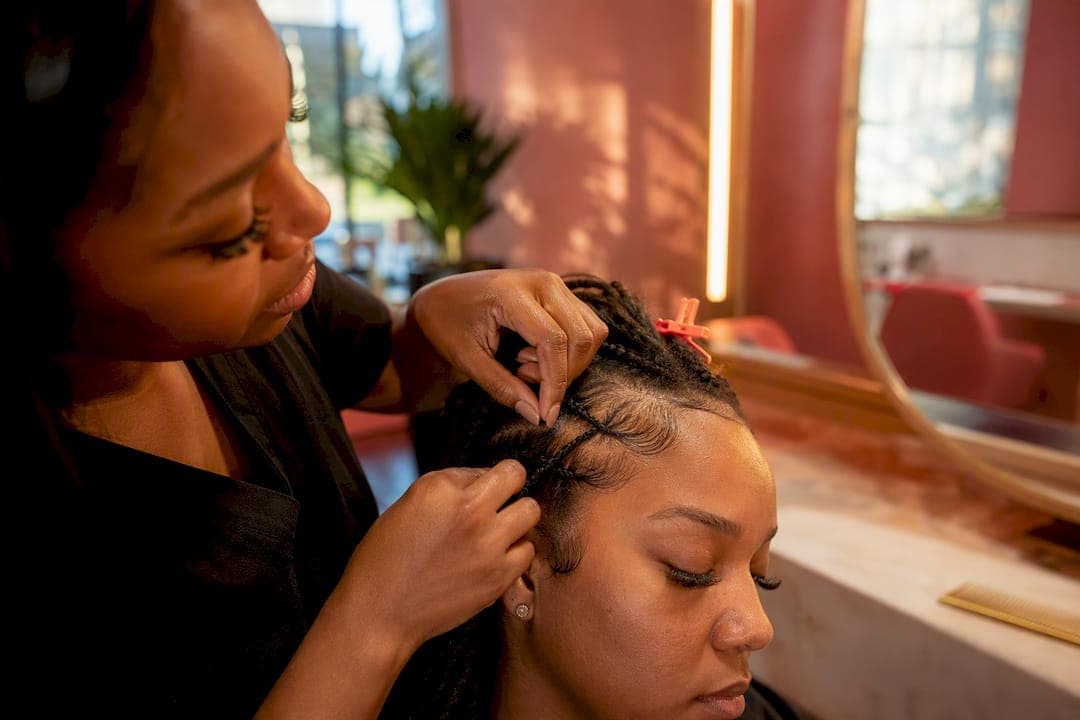
A braid touch-up refreshes perimeter roots, edges, and small loose sections without a full reinstall, and it saves both time and length when done correctly. Knotless braids, box braids, and crochet styles all respond well to a touch-up. If only the front rows or a few isolated sections are loose, a touch-up is the right call. If several rows are unraveling at once or your scalp hurts, skip the touch-up and book a reinstall instead.
TL;DR:
- DIY touch-ups are best performed on isolated loose sections, not when multiple rows are unraveling or when the scalp is sore or inflamed.
- Proper preparation, including detangling, cleansing, and moistening the hair before rebraiding, is crucial to prevent breakage and ensure a lasting fix.
- A professional touch-up typically includes a root refresh, partial rebraiding, scalp cleansing, and careful tension management to avoid damage and bumps.
- Using lightweight, water-based products and fully drying the scalp after washing significantly improves the longevity and health of the style.
- Signs of needing a full reinstall instead of a touch-up include extensive unraveling, scalp discomfort, and style longevity exceeding six weeks.
Table of Contents
- How Do You Do a DIY Braid Touch Up at Home?
- When Should You Book a Professional Touch-Up Instead?
- What Products and Tools Keep a Touch Up Safe?
- How Do You Care for Your Scalp Between Touch Ups?
- Is It Time for a Reinstall Instead of a Touch Up?
- What Our Braiders Recommend for a Lasting Touch Up
- What People Get Wrong About Refreshing Braids
- Book a Braid Touch Up With Afromagicbraiding in Southfield
- Sources
- FAQ
How Do You Do a DIY Braid Touch Up at Home?
Most touch-ups fail for one reason: the person skips prep and jumps straight to rebraiding tangled, dry hair. Do the groundwork first, and the actual braiding takes half the time.
Before you touch a single row, gather what you need: a rat-tail comb, a spray bottle with water and a lightweight leave-in, edge control, a crochet hook, and butterfly clips to hold sections out of the way. If the area you're working on looks dusty or oily at the roots, do a quick cleanse first. A water-and-vinegar soak works well for synthetic hair that hasn't been washed since install, since it lifts manufacturing residue that can cause dryness in braiding hair.
Here's the sequence Afromagicbraiding stylists follow for a perimeter or knotless refresh:
- Section and detangle. Part off the area that needs work, from temple to nape along the hairline. Detangle the new growth gently with your fingers before touching a comb to it, since braided hair snags easily at the root.
- Remove only what's loose. Unravel just the rows that have slipped, usually the front two or three. Leave the rest of the style alone. Pulling out more than you need to just adds unnecessary tension to hair that's already stressed at the root.
- Prep the exposed section. Spray with your water and leave-in mix, then work in a small amount of moisturizer through the new growth. Dry, brittle hair breaks the moment you start braiding it.
- Retwist or rebraid. Follow the original parting pattern and rebuild each row with the same tension as the rest of the style, not tighter. For knotless specifically, feed in hair gradually and stop tightening after three or four twists per section. Twisting past that point risks starting a localized lock where the hair should stay loose.
- Set the edges. Once the rows are done, smooth edge control along the hairline with a soft brush and lay them in your preferred pattern. Don't overload this step. A thin layer holds; a thick one flakes by day two.
- Finish with heat. A warm towel or a few seconds of steam seals the edges and knocks down frizz without soaking the extensions. Skip boiling water; instead, use Modern Style with Ash Blonde Hair Extensions - Bella-Lu heat methods to seal the edges and knock down frizz without soaking the extensions. It's harsh on synthetic strands and does more damage than good.
Crochet styles get a slightly different fix. If a section has slipped out of its loop, lift the loose piece with your crochet hook, guide it back through the cornrow base, and lock it in with a small latch motion before pinning it flat until it settles. This takes minutes per section and rarely requires touching the rest of the install.
Once every reworked row is done, wrap your hairline with a silk or satin scarf for a few hours, or overnight if you can. This keeps the new sections lying flat while everything sets.

Pro Tip: Keep a small travel bottle of diluted leave-in in your bag. The single biggest mistake in a DIY touch-up is braiding dry hair, and a 30-second spritz before you start prevents most of the breakage people blame on the braiding itself.
When Should You Book a Professional Touch-Up Instead?
A DIY fix handles a loose edge or two. A salon visit handles everything else. Book a professional when you notice any of the following:
- Multiple rows across different parts of your head are loose or unraveling, not just the perimeter.
- Small bumps have formed along the hairline that don't flatten with gentle pressure.
- Your scalp feels sore, tight, or tender days after install, not just on day one.
- You notice redness, itching, or flaking that looks like a reaction rather than ordinary dryness.
A typical salon touch-up covers more ground than a home fix. Expect a root refresh along the perimeter, a partial rebraid of any sections that slipped, a light scalp cleanse to clear buildup, a pass of moisturizer through the reworked hair, and edge tensioning that's checked for comfort rather than just appearance. This bundle of partial services, rather than a single isolated fix, is standard practice at braiding salons that offer touch-ups as their own line item separate from full installs.
Before you book, ask your stylist a few direct questions: How long should this touch-up realistically last before I need another one? Will you keep tension loose enough to avoid new bumps? Does the service include a scalp cleanse, or is that separate? Session length and cost both depend on how much rebraiding is involved, whether a scalp treatment is included, and how much new growth has come in since your last visit. Most salons prefer you arrive with hair that's been lightly cleansed within the past few days rather than freshly washed the morning of your appointment, since some product residue actually helps hold the new sections in place.
What Products and Tools Keep a Touch Up Safe?
The right products make the difference between a touch-up that lasts and one you're redoing in two weeks. Keep the list simple:
- Edge control for smoothing the hairline, applied thin.
- Lightweight mousse for taming frizz along reworked rows without weighing down new growth.
- Curl cream if your style has a curly or wavy perimeter that needs definition after retwisting.
- Witch hazel wipes or a diluted, sulfate-free shampoo for cleansing the scalp between full washes.
- A lightweight oil or serum, used occasionally on the scalp rather than daily, since regular heavy oiling clogs follicles and invites buildup.
- Braid refresher spray for a quick shine and moisture boost on days you're not doing a full touch-up.
On tools: a crochet hook, a fine-tooth rat-tail comb, a spray bottle, a soft-bristle edge brush, and a wide-tooth comb cover nearly every touch-up scenario. Stylists and beauty editors consistently point to water-based leave-ins over heavy, petroleum-based products for braid maintenance, since thick butters sit on top of braided hair rather than absorbing into it.
What to avoid matters just as much as what to use. Heavy butters or oils applied directly at the scalp trap sweat and product against the skin, which is exactly the environment buildup thrives in. Thick, high-hold gels flake within days on braided textures and leave white residue along the hairline that's more noticeable than the frizz you were trying to fix. Keeping products light at the root and reserving heavier formulas for the ends of the hair, if you use them at all, avoids most of this. Explore Afromagicbraiding's scalp care guidance for more on picking formulas that won't build up between touch-ups.
How Do You Care for Your Scalp Between Touch Ups?
Your scalp does the real work of holding a style together, and it needs more attention than most people give it once the braids are in. A weekly wipe-down with witch hazel on a cotton pad clears sweat and product buildup without weighing down the hair or scalp, and it takes under a minute.
Beyond the weekly wipe, wash your scalp every one to two weeks using a diluted, sulfate-free cleanser applied directly to the skin rather than saturating the whole style. Focus the water and product at the root, rinse thoroughly, and resist the urge to scrub aggressively, since braided roots are more sensitive to friction than loose hair.
Drying matters more than most people realize. Synthetic extensions hold water inside their core, and if you don't dry the braids all the way through after washing or a touch-up, that trapped moisture turns into mildew within days. A musty smell or a dull, damp feel at the root days after washing is the giveaway. Professionals recommend sitting under a cool dryer or fully air-drying before wrapping your hair up or going to bed.
- Weekly witch hazel wipe for oil and sweat control.
- Scalp wash every one to two weeks, product applied at the root only.
- Full drying after every wash or wet touch-up, no exceptions.
- Watch for small white bulbs at the base of individual strands. That's a sign of traction damage, not just tightness.
Pro Tip: If a bump doesn't flatten within 48 hours or you notice a white bulb where a strand meets your scalp, stop touching that section and have a professional look at it before your next scheduled touch-up.
Is It Time for a Reinstall Instead of a Touch Up?
A touch-up only makes sense within certain limits. If more than roughly a quarter of your style has loosened, or several adjacent rows are unraveling together rather than one isolated section, a touch-up will look patchy and won't hold as long as a proper reinstall.
Scalp health overrides everything else. Open sores, severe or worsening pain, or any sign of infection means the braids come out now, not after your next scheduled appointment. Time in the style matters too. Braids with extensions left in beyond roughly six weeks carry a higher breakage risk at the root, even if they still look fine on the surface. At that point, a touch-up buys you a little time, but it doesn't reverse the strain the style has already put on your hairline. A reinstall costs more upfront, but it protects your length in a way a repeated round of quick fixes can't. Read more in Afromagicbraiding's guide to styles that hold up over weeks of wear.
What Our Braiders Recommend for a Lasting Touch Up
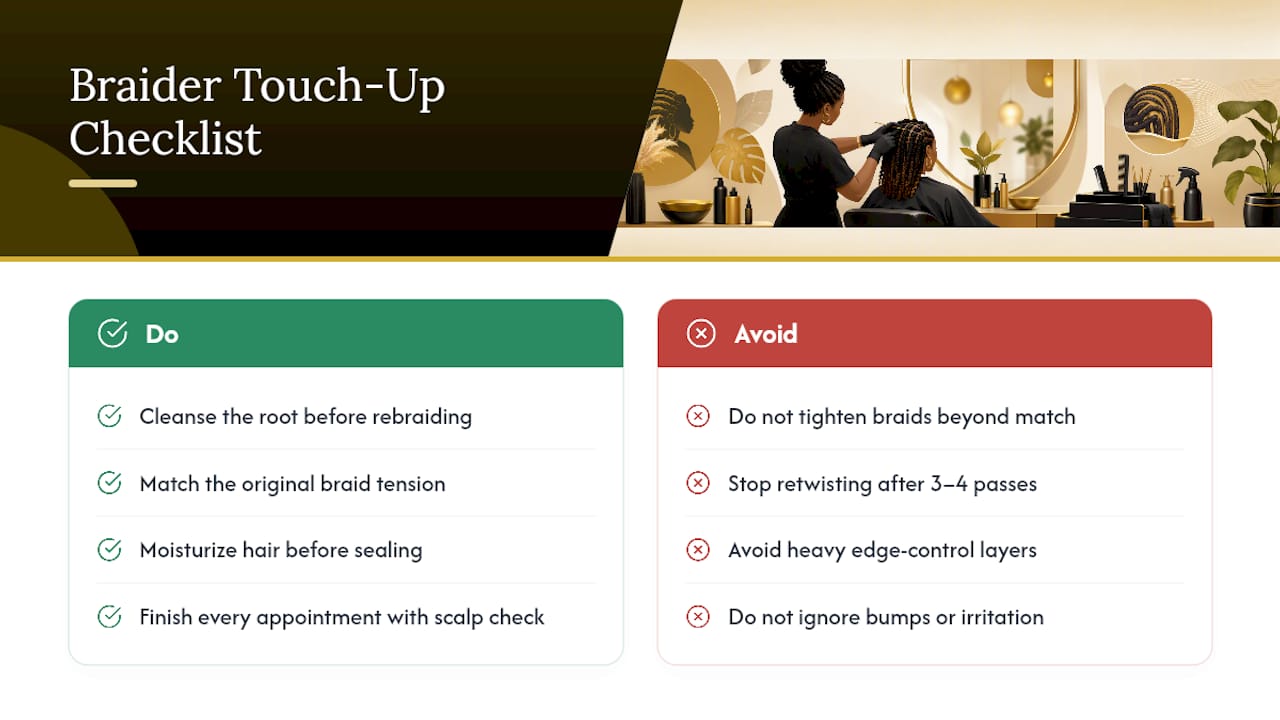
Stylists follow a checklist on every perimeter or knotless touch-up: cleanse the root first, rebraid at matching tension rather than tighter, moisturize before sealing, and stop retwisting after three or four passes to avoid locking new growth. Edge maintenance gets a thin layer of control, never a heavy one. Every appointment ends with a scalp check, since a bump that looks minor on day one can turn into real irritation by day five if it's ignored. For deeper reading on scalp routines between visits, see our maintenance tips guide.
What People Get Wrong About Refreshing Braids
Most advice on refreshing braids treats every loose section the same way, and that's the core problem. A single loose edge and a scalp that's been sore for three days are not the same situation, but generic guides push readers toward the same "just retwist it" answer regardless.
The other overlooked issue is drying. People will spend an hour perfecting a touch-up and then go to bed with damp roots, undoing most of the benefit within a week. Drying fully isn't a footnote. It's the difference between a touch-up that lasts a month and one that starts smelling off in five days.
If you take one thing from this guide, prioritize scalp signals over hairline appearance. Bumps that don't flatten, soreness that lingers, or white bulbs at the root all matter more than whether your edges look perfectly smooth. Fix the scalp issue first, and the style will hold. Ignore it, and no amount of edge control will save the install.
— Afro
Book a Braid Touch Up With Afromagicbraiding in Southfield
A professional touch-up option is available instead of guessing your way through a home fix, especially when your scalp needs a real look rather than another spritz of leave-in. Stylists handle perimeter refreshes, partial rebraids, and scalp cleanses as a standard part of the touch-up appointment, not an upsell.

When you book, tell your stylist how old your current style is, which sections need attention, and whether you've noticed any bumps or soreness. Bring a photo of your original install if you have one, and arrive with hair that's been lightly cleansed rather than freshly washed that morning, since a little residue helps the new sections hold. Browse a portfolio of touch-up and knotless work to see the finish you can expect, then head to a booking page to grab a slot before your perimeter rows get past the point a quick refresh can fix.
Sources
- Witch hazel for hair: benefits, uses, and more - Healthline
- How to wash box braids and care for protective styles - L'Oréal Paris
- Braiding hair: styles, colors, techniques, and maintenance - WebMD
- How to wash braided hairstyles - Allure
FAQ
Can Braids Be Touched Up?
Yes. Knotless braids, box braids, and most crochet styles can be touched up at the perimeter or in isolated loose sections, though widespread unraveling across many rows usually calls for a full reinstall instead.
How Do I Fix Braid Bumps?
Small bumps often flatten with gentle finger massage and a light coat of oil, but a bump that stays raised or tender past 48 hours can signal traction damage and should be checked by a stylist rather than covered up.
How Do I Touch Up My Knotless Braids?
Remove only the loose front rows, prep the new growth with a leave-in and moisturizer, then rebraid at matching tension, limiting retwists to three or four passes per section to avoid starting a lock at the root.
Can Brazilian Wool Be Retouched?
Yes, Brazilian wool responds to the same perimeter touch-up approach as other braiding hair, though its coarser texture holds tension differently, so a stylist familiar with the material will get a cleaner, longer-lasting result than a rushed DIY fix.